How to use Glitter Iron On with a Cricut: A Complete Tutorial for Beginners
Learn the basics of how to use glitter iron on with a Cricut Maker or Explore machine and how to apply it to a shirt with this step by step tutorial- perfect for a busy mom!
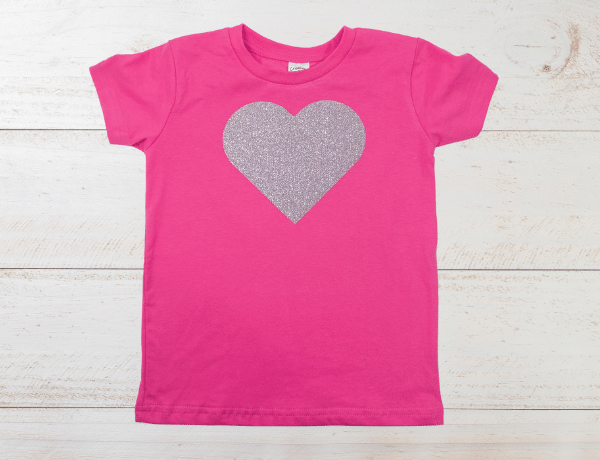
One of the things that excited me the most when I got my Cricut Explore machine was that I could make custom shirts for my little girl! I was especially excited to use glitter iron with my Cricut, because every little girl loves sparkles! Creating custom shirts with glitter iron on is so fun and can really let you show off your little one’s personality! Plus, it’s pretty easy once you know what you’re doing!
So today we’re making a simple project using glitter iron on (also called heat transfer vinyl) that even the busiest mom can do in about half an hour! Let’s get you familiar and confident with your Cricut Maker or Explore machine so that you can start creating your own amazing custom shirts with glitter heat transfer vinyl too!
This post may contain affiliate links. If you purchase something through the link, I may receive a small commission at no additional cost to you. I only recommend products I know and love!
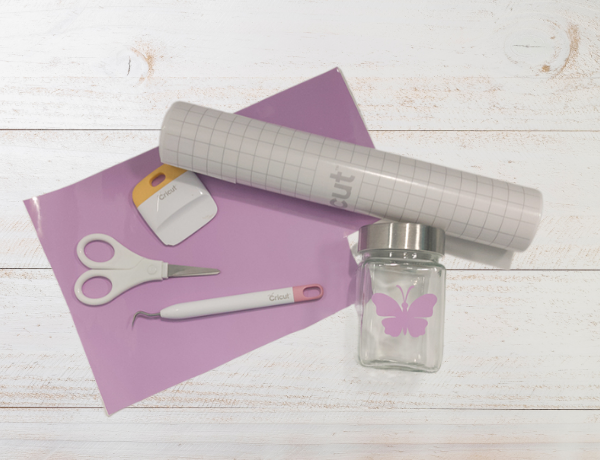
Materials Needed:
- T-Shirt
- Glitter Heat Transfer Vinyl or Glitter Iron On (I LOVE and recommend this brand!)
- Cricut Cutting Machine
- Standard Cricut Cutting Mat
- Fine Point Blade
- Weeding Tool
- Scissors
- Iron or Cricut EasyPress
- Cricut EasyPress Mat or Towel
Design Your Glitter Heat Transfer Vinyl Project:
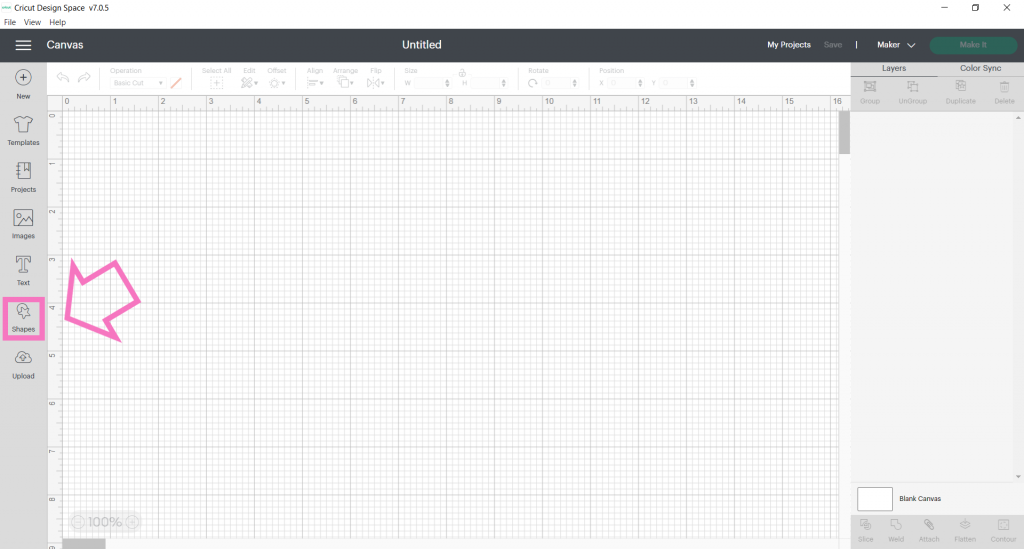
Open Cricut Design Space and select New Project.
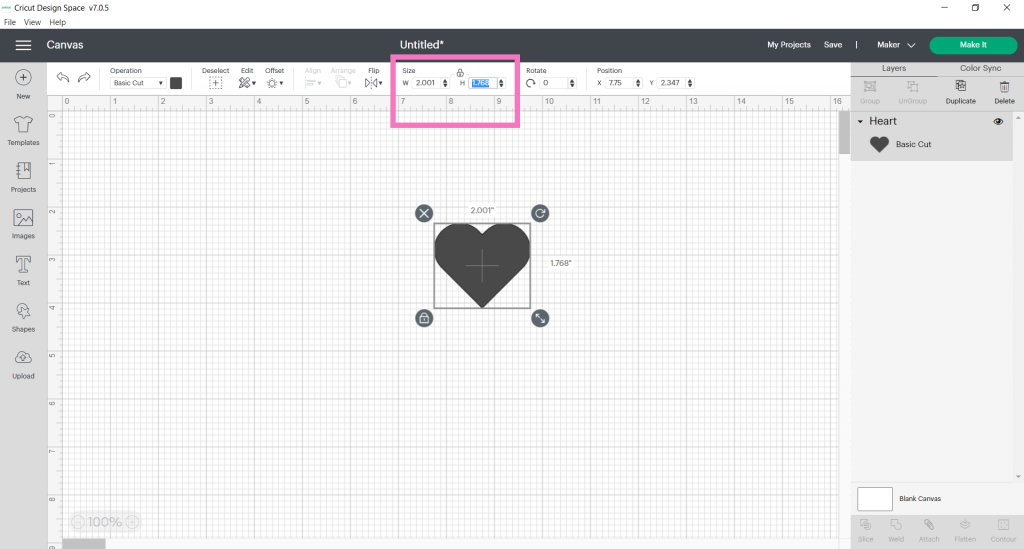
Next, click on Shapes and select the heart.
Resize Your Design:
Now we need to determine the size of our image. I always like to grab my base material, in this case, the shirt, and a ruler to decide the best size.
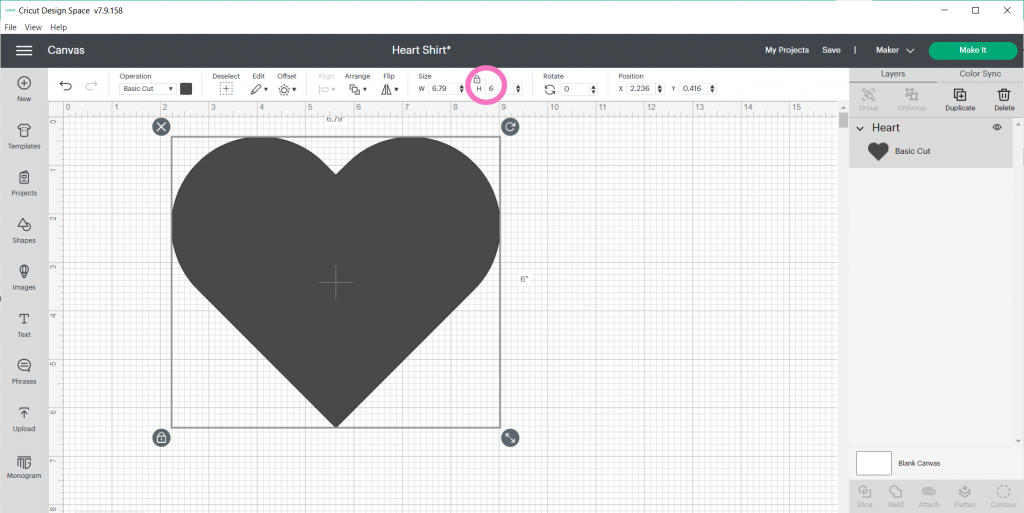
After you’ve determined the size for your design, go to the middle of the top Edit bar, find “size” and change it. Simply highlight .the current numbers in the box and insert the size you want.
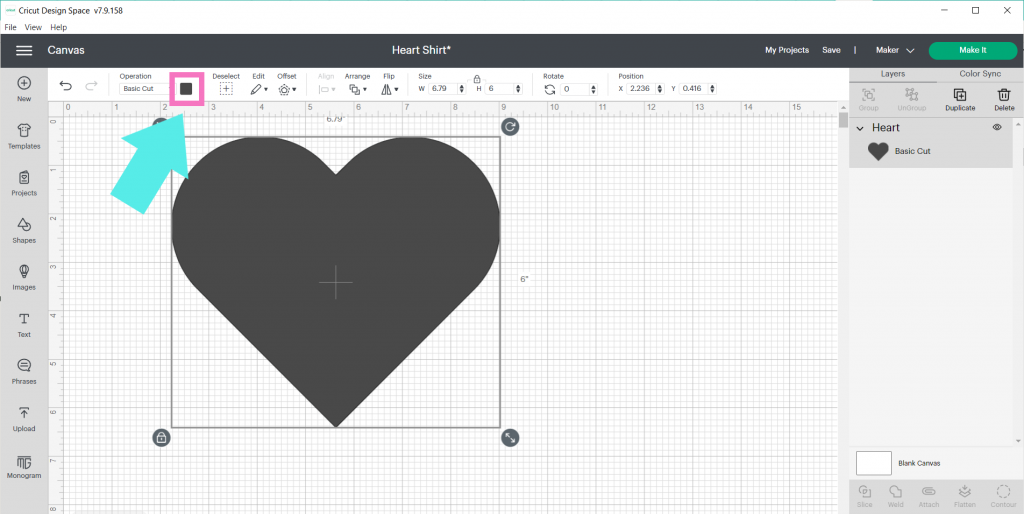
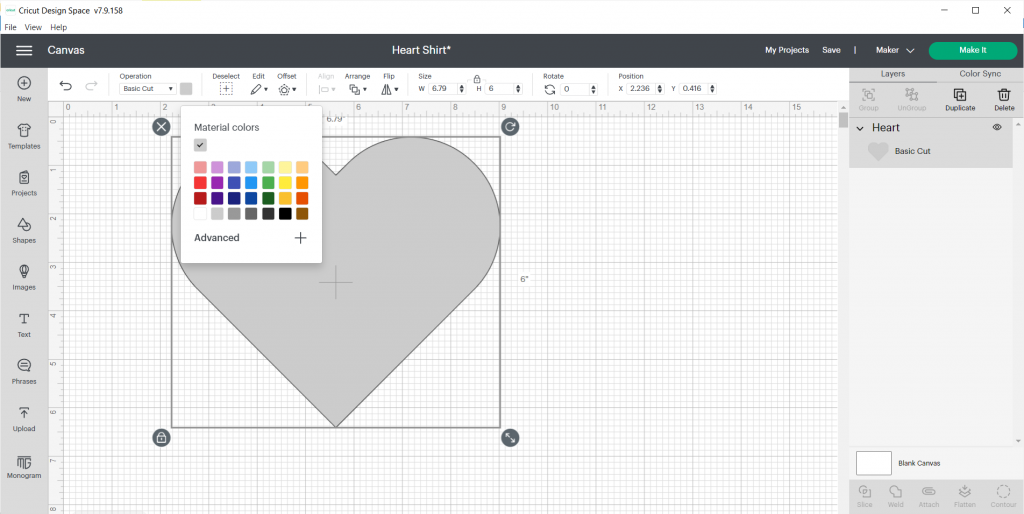
Optional: Change the Color
Go to the colored square in the left-hand side of the top Edit bar to change the material color. This step is completely optional since we are just cutting out a single layer, but sometimes it’s nice to have that visual! Your Cricut machine will cut out whatever color material you put on the cutting mat no matter what the color is in Design Space!
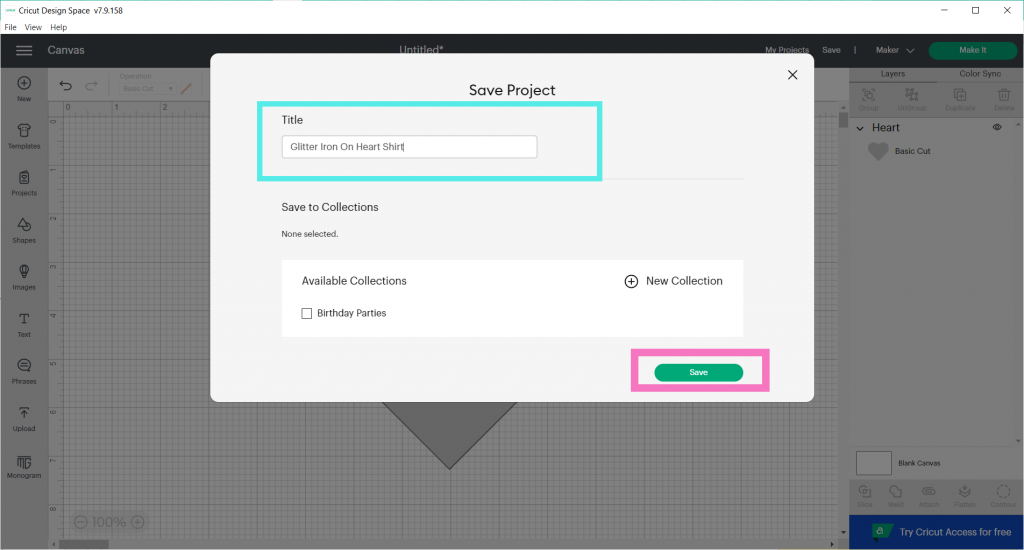
Save and Title Your Glitter Iron On Project!
Before you go to make your project, go ahead and save it!
Click on Save in the upper right of the Header.

Now give it a title and click save!
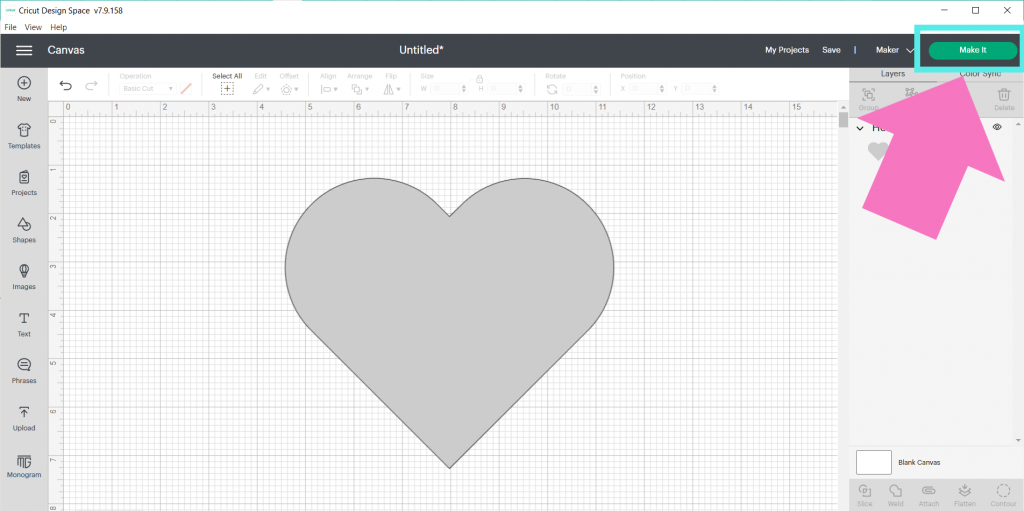
Let’s Make it!
Now, we’re ready to cut our glitter HTV project! Click on Make It in the upper right-hand corner.
Next, make sure your machine is either connected via Bluetooth or connected with a USB. Check out Cricut’s tutorial here on how to pair your Cricut Explore or Cricut Maker Via Bluetooth.
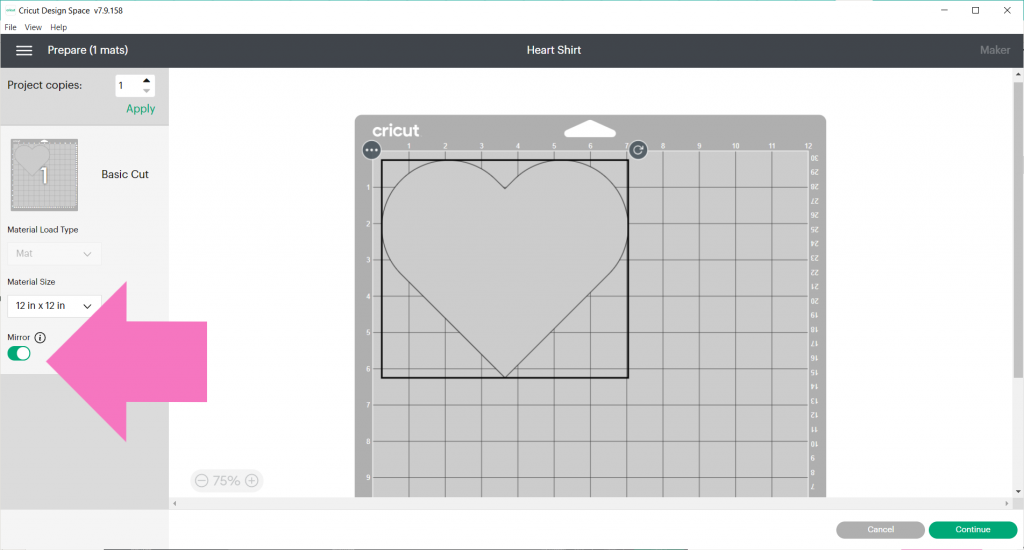
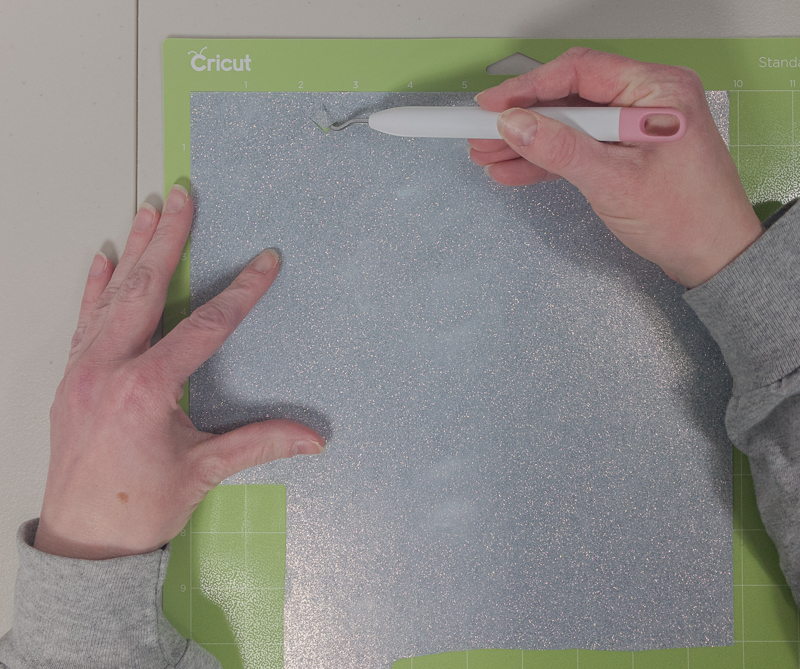
Grab your glitter heat transfer vinyl and Cricut mat.
For any type of iron on, you always want to make sure you put the shiny side of the material FACE DOWN ON THE MAT!
You also want to make sure “mirror” is checked when working with any type of heat transfer vinyl or Cricut Iron On.
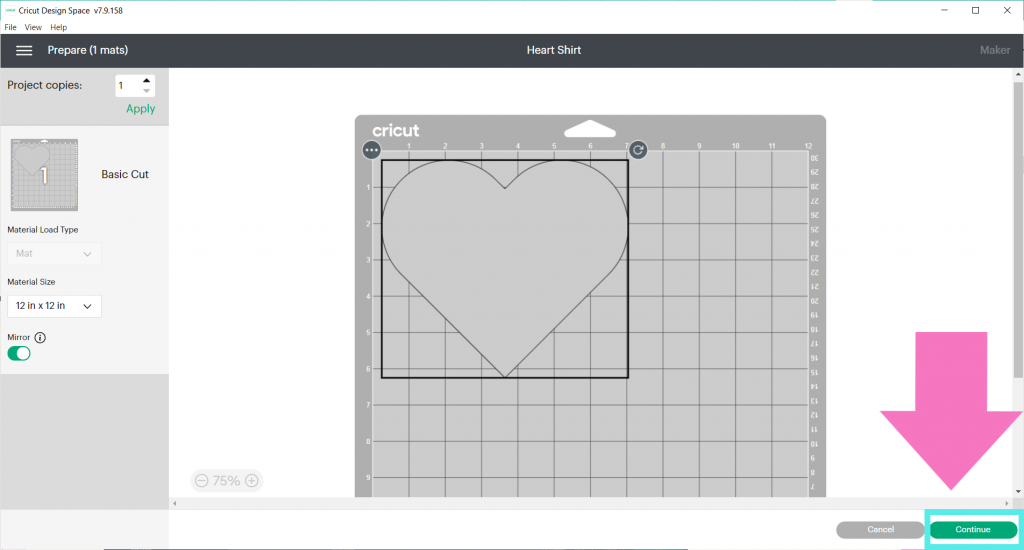
Click Continue in the bottom right-hand corner.
Your machine may take a minute to connect to Bluetooth.
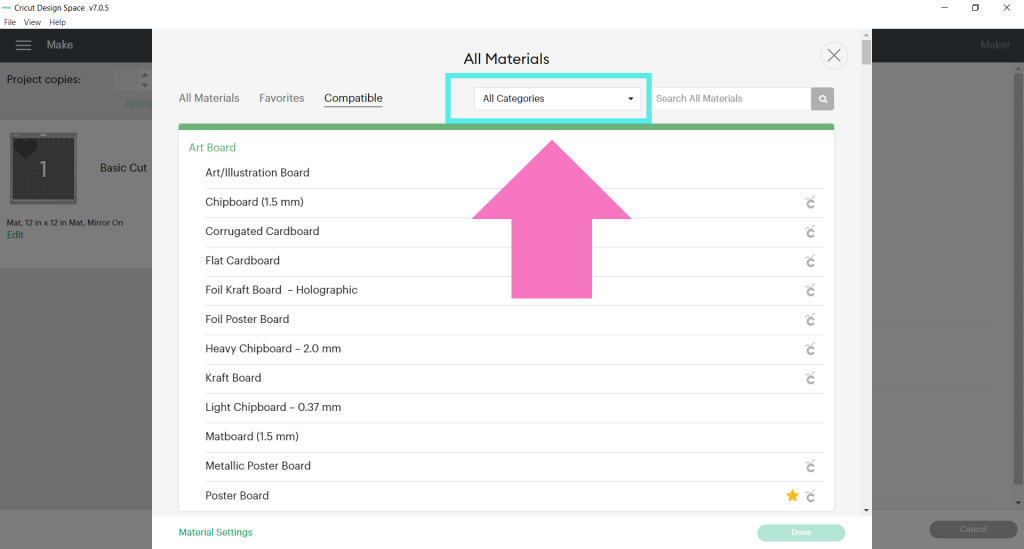
Once it connects, you need to choose the cut setting for glitter iron on. For the Cricut Maker, click on Browse All Materials.
Then click on All Categories.
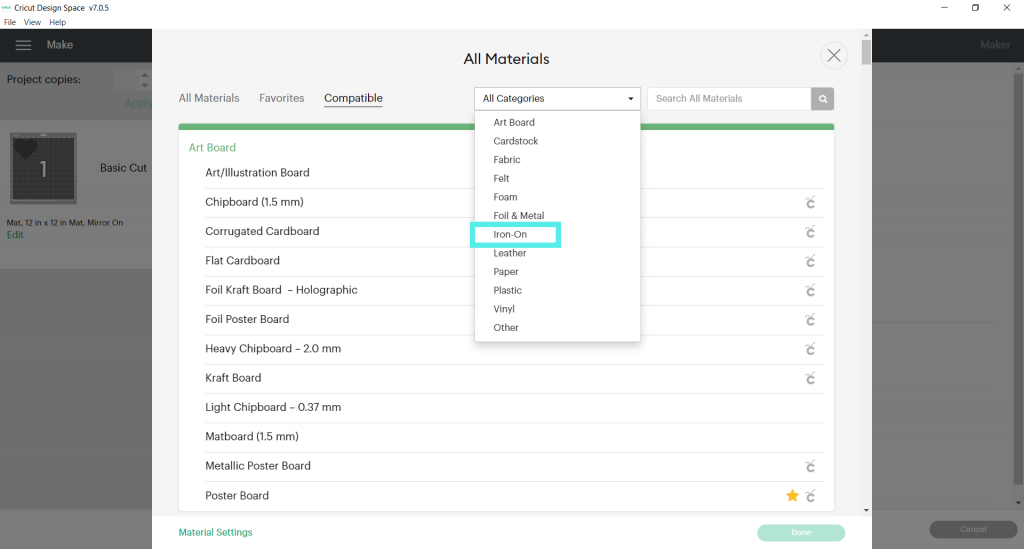
Select Iron On.
Then select Glitter Iron On.
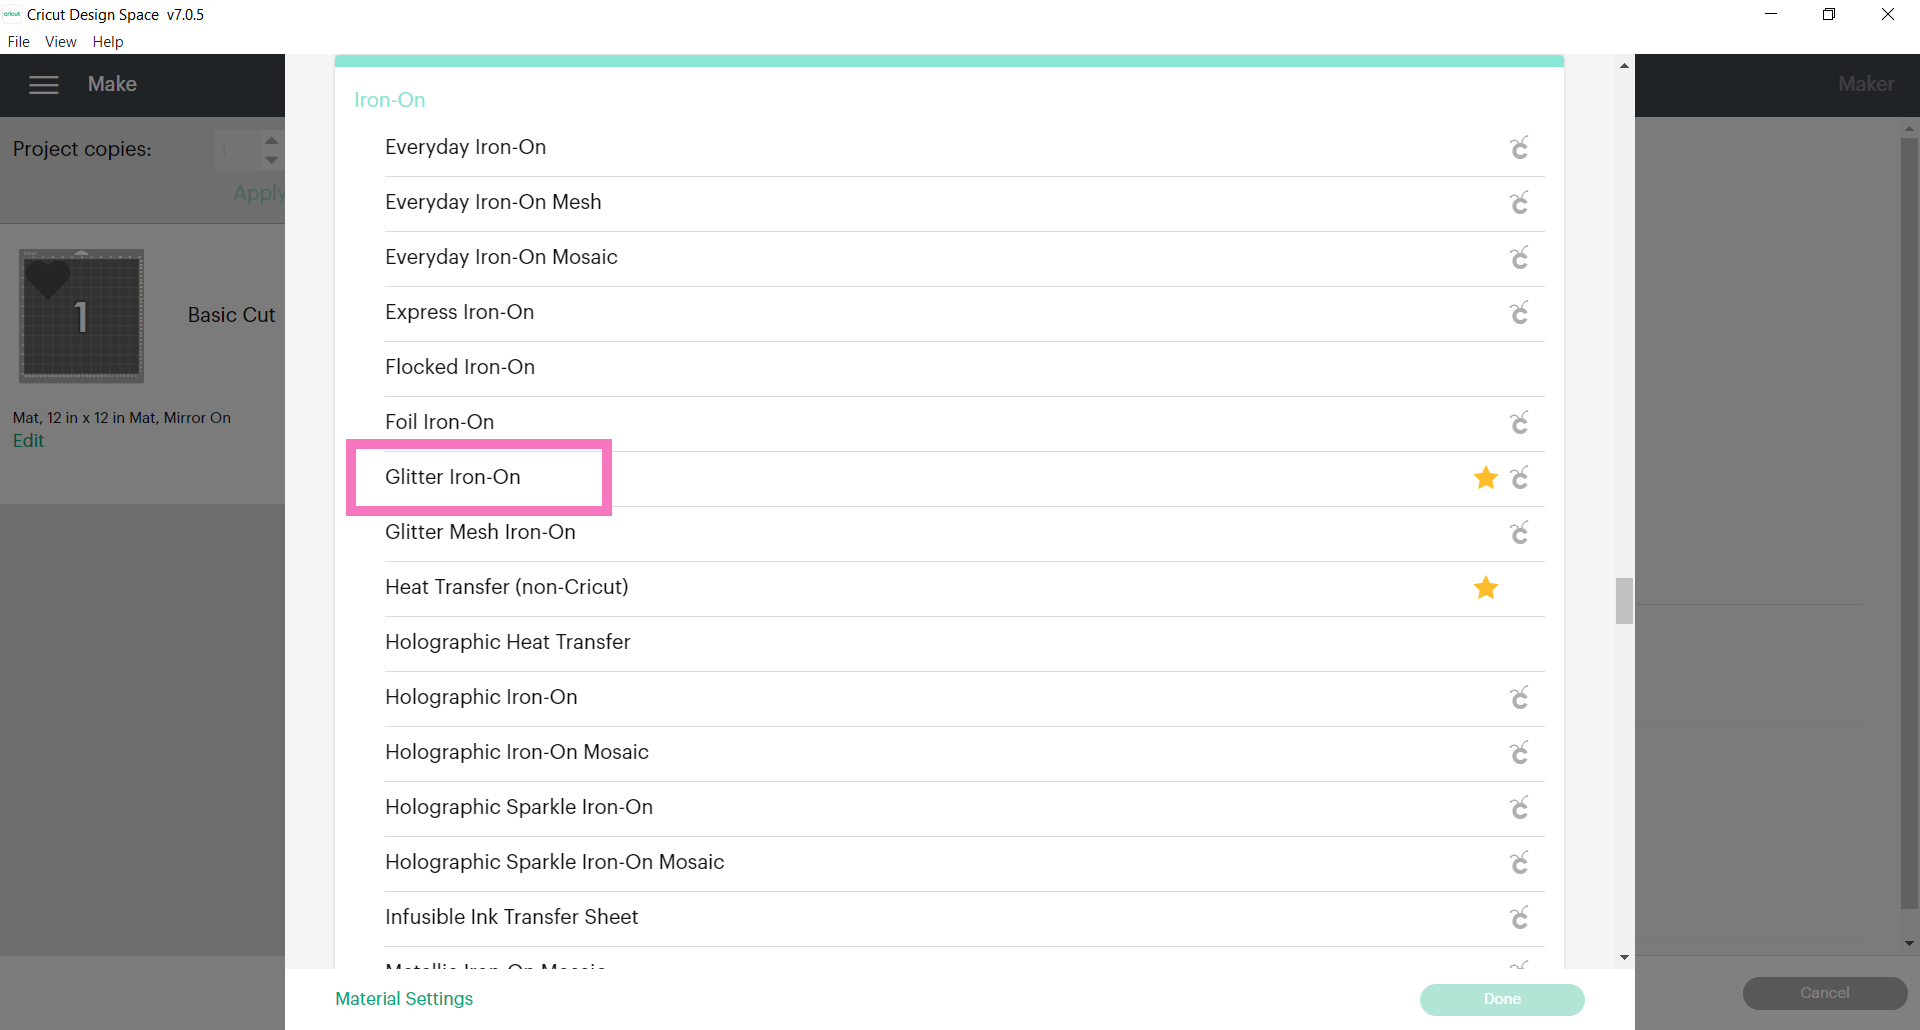
If you are using non-glitter heat transfer vinyl iron on, choose Iron On.
If you’re using a Cricut Explore machine, turn the dial to Iron On+ for glitter heat transfer vinyl.
(Note: ALWAYS do a small test cut of your material first if you are unsure of your setting.)
Insert your mat and press the blinking load button.
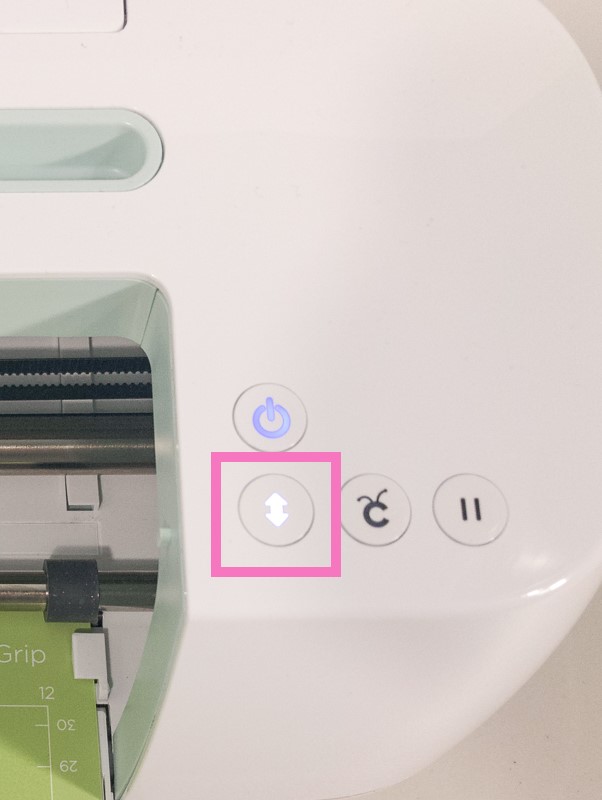
Press the cut button once it starts to blink and wait for your Cricut to work its magic!

After the cut is done, press the blinking unload button to release your mat.
Almost done!!
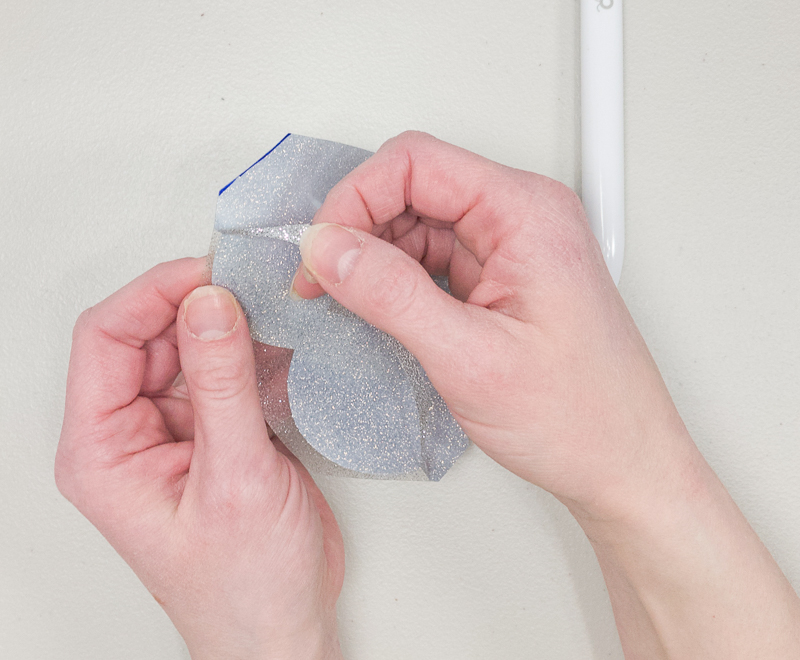
Weed Your Glitter Iron On Design:
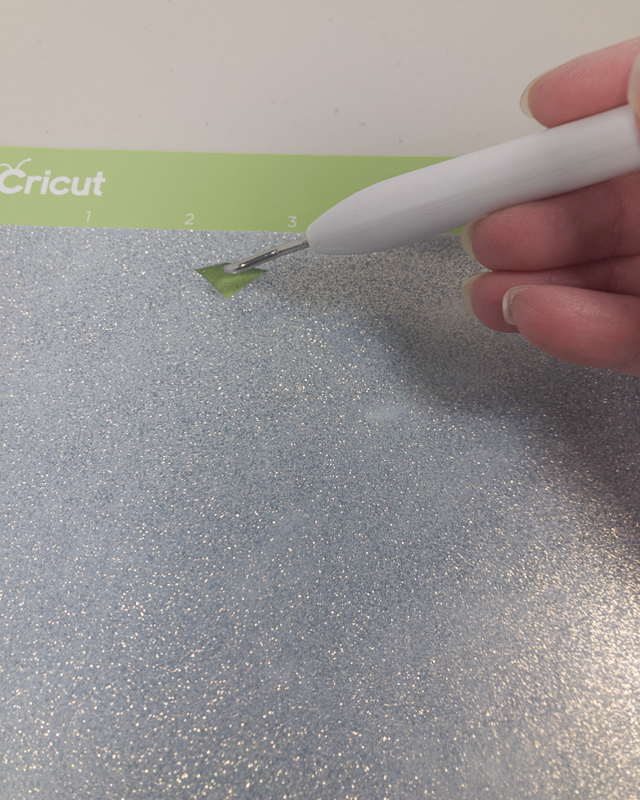
The next step is to weed your glitter heat transfer vinyl design! Weeding is removing all the excess material in your design that you don’t need.
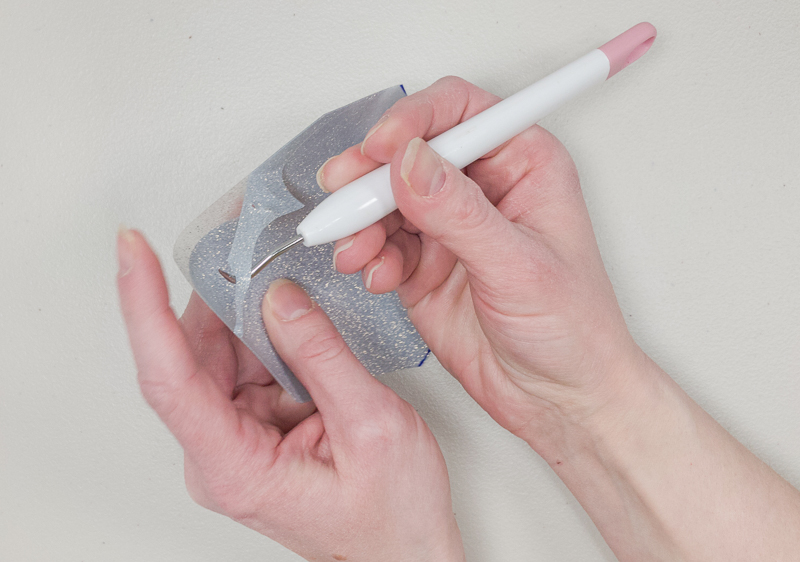
Using a weeding tool, find the valley at the top of the heart. Hook your weeding tool here and start to lift up. This will help you see where your design is on your material. Glitter iron on can be really hard to see!
You can continue to weed your design while it is on your mat, or you can take the glitter iron on off the mat and cut around it. I prefer to take it off.
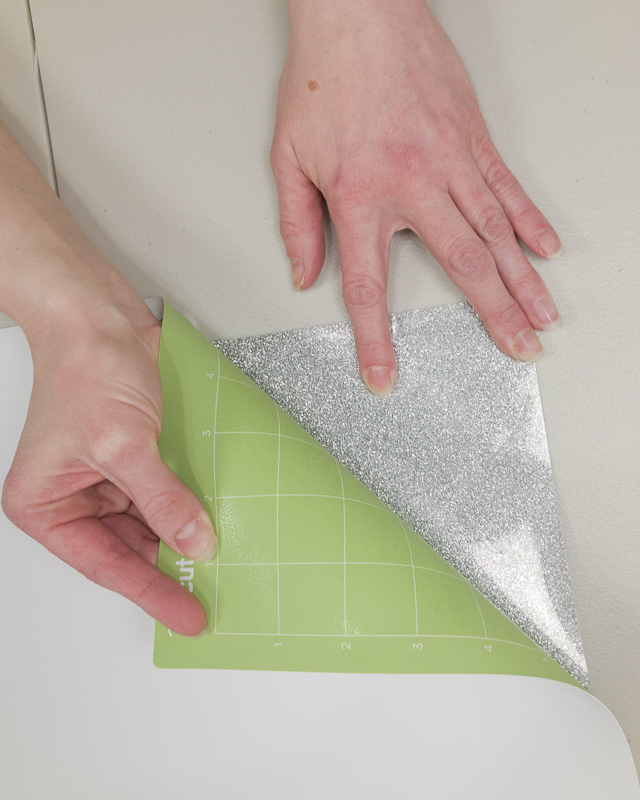
HOT TIP: Remove the mat from the material and not the material from the mat. This prevents your material from curling- a total game changer and must when working with cardstock!
To do this, place your hand on the glitter iron on a table or hard surface, then use your other hand to lift the mat away from your material.
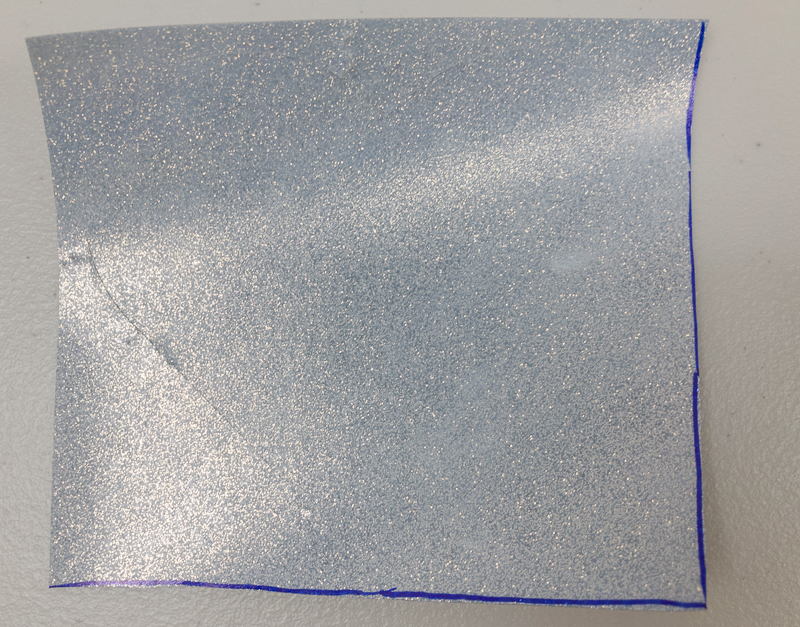
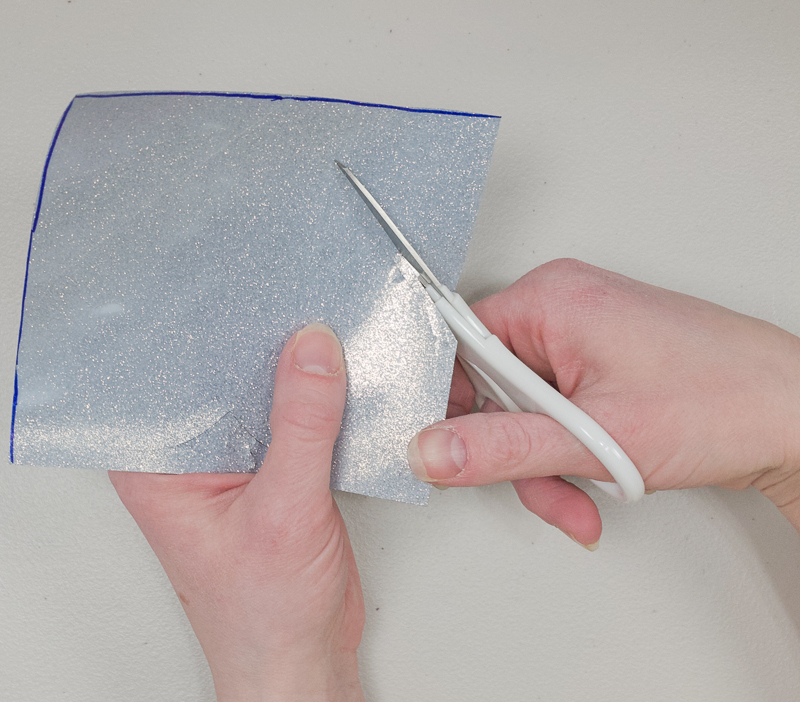
After you’ve removed your glitter iron on from your mat, it’s time to finish weeding it. I like to cut a square around my design, to save as much of my glitter heat transfer vinyl for future projects. Any iron on that you remove from the plastic carrier sheet cannot be reused.
Because glitter iron on can be really hard to see, I sometimes draw a line with a marker so I know where to cut. You want to make sure you’re not cutting off any of your design, but you also want to save as much of your glitter heat transfer vinyl for next time! Don’t worry, the marker will have no impact on your cut design!

Cut along your lines and save your leftover glitter iron on for future projects!
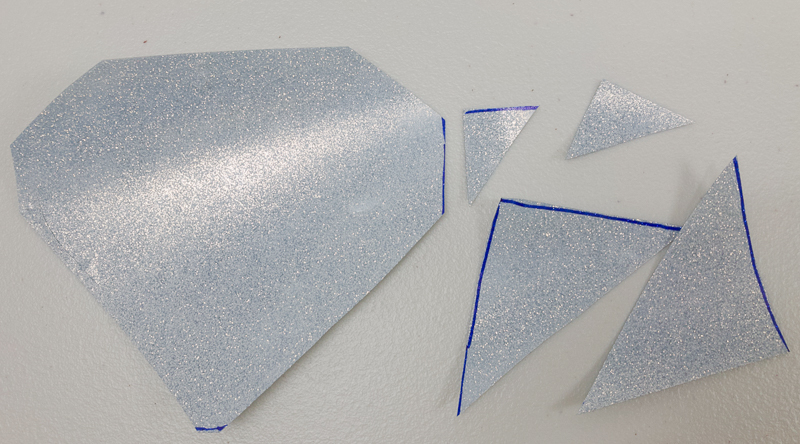
Now, you can go ahead and weed here, but again, I like to save as much of my glitter heat transfer vinyl as possible! So at this point, we’re basically cutting around the heart. Just make sure to not cut off any of the heart!
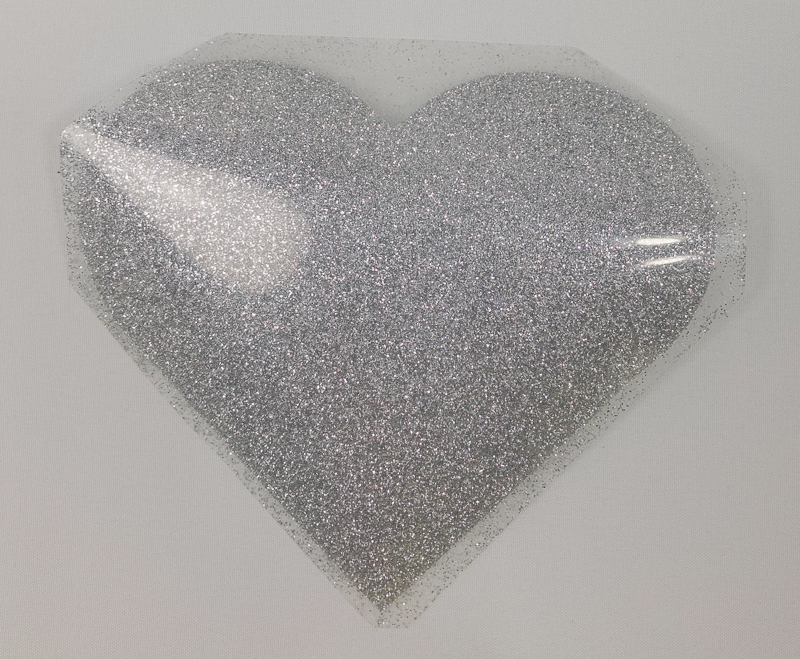
Now you’re left with some glitter iron on scraps that are perfect for test cuts, as well as testing with a heat press, iron, or Cricut EasyPress!
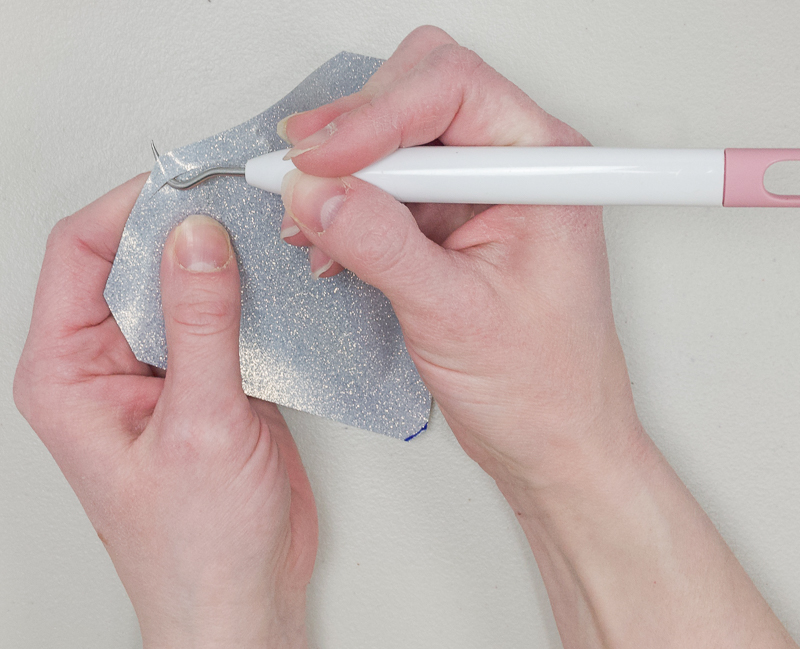
Continue Weeding Your Glitter Iron On:
Now you’re ready to officially weed your heart! Starting in one of the corners, insert your weeding tool and begin to lift up. Go all the way around your heart until you’re left with just the heart!
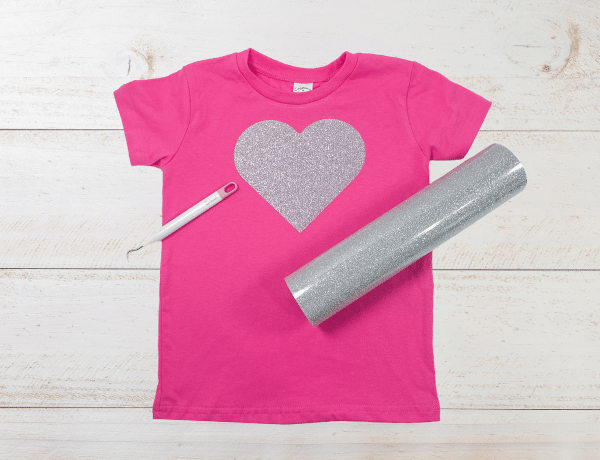
Apply Your Glitter Heat Transfer Vinyl Design to Your T-Shirt:
After you’ve weeded all your excess material, it is time to apply your glitter iron on design to your shirt!
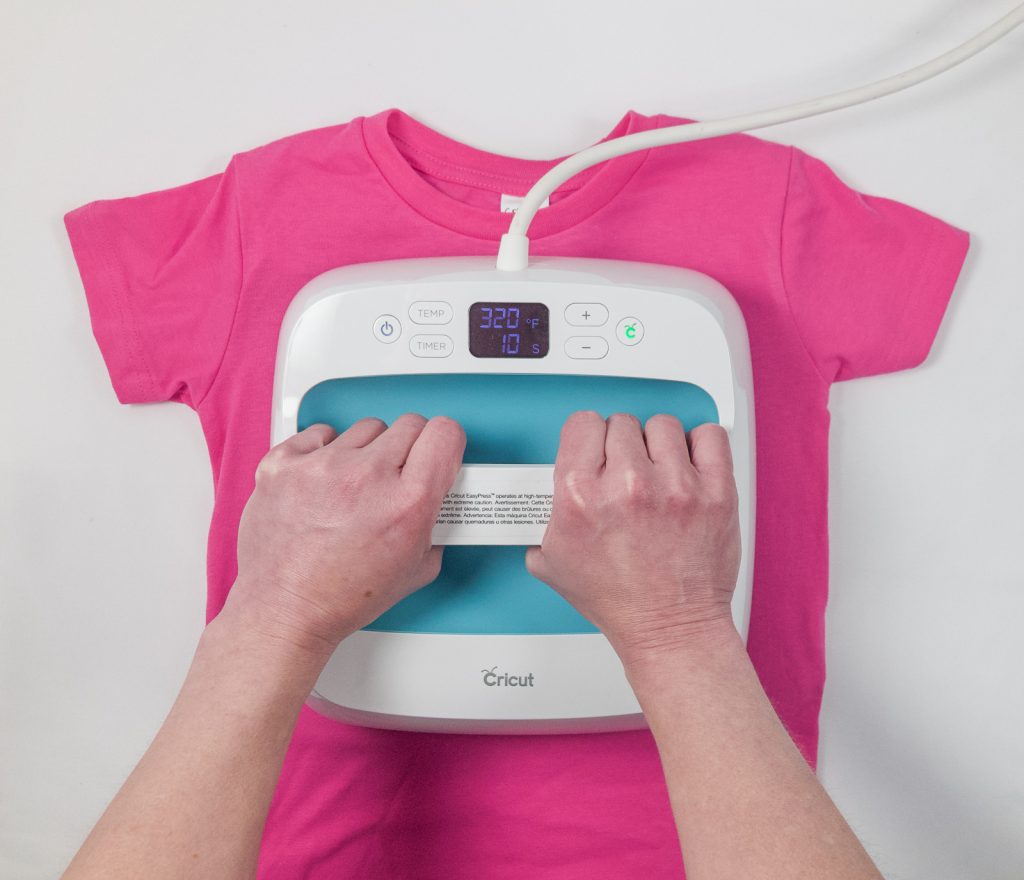
I will be using my Cricut EasyPress, but you can also use an iron. Check out this tutorial on how to use HTV with an iron.
Set your iron or EasyPress on a hard surface and place your shirt either on a folded towel or the Cricut EasyPress Mat.
For, Siser glitter HTV, set your EasyPress to 320 for 10-15 seconds with firm pressure.
(If using Cricut Glitter Iron On, set your easy press to 330 for 30 seconds.)
Once heated up, run your Cricut EasyPress or iron over your shirt a few times to get out the wrinkles. This also warms up the fabric, therefore, making it easier for the design to stick.
Now, place your design where you want it and press!
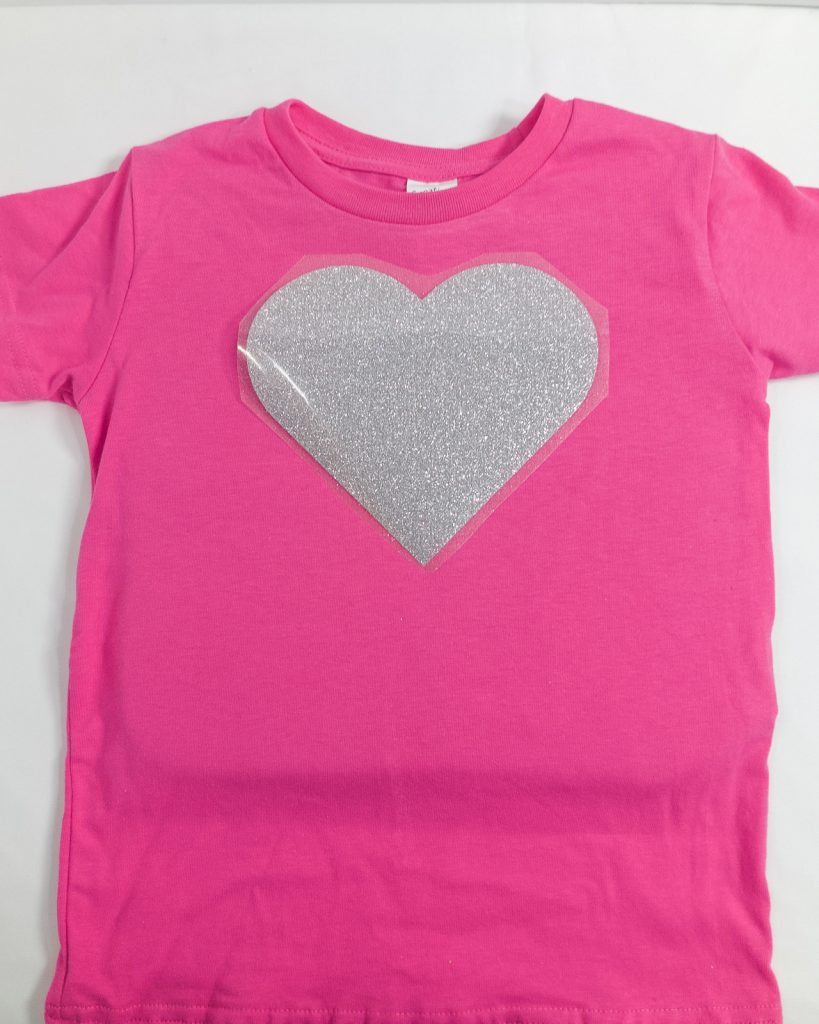
Peel back a little of the plastic carrier sheet and check to see if it stuck to your shirt. If any of the design is coming up, then press again.
Remove the Carrier Sheet:
Once your design is well adhered to your shirt, remove the plastic carrier sheet from your glitter heat transfer vinyl. For glitter iron on, you want to do a warm peel. Wait a few seconds for it to cool down so you don’t burn yourself, then gently remove the carrier sheet by lifting it up while it is still warm. And voila! Your shirt is done!
Make sure to wait a full 24 hours before washing!
And there you go! You now know the steps for using glitter HTV on a shirt! And the cool thing is that this process is pretty much the same for non-glitter iron on, so now you can make even more projects!
Did this post give you more confidence and ideas to make other custom shirts? Tell me in the comments!
Have a Cricut question or tutorial you’d like me to write on? Let me know!