How to Upload Images to Cricut Design Space
Wondering how to upload that perfect image you found to Cricut Design Space? Keep reading!
One of the great features of Cricut Design Space is the ability to upload your own images to help you create that perfect project! There are so many great SVG and PNG files out there for Cricut users, that knowing how to upload images to Design Space is a must! Plus, it’s easy!
How To Upload Images To Cricut Design Space: SVG Files
1. Download Your SVG Image To Your Computer
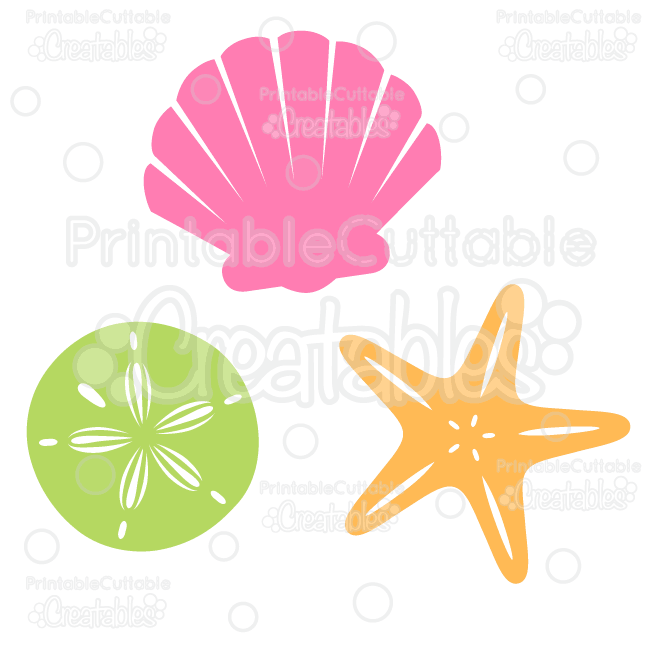
I am a big fan of Kristin’s designs at Printable Cuttable Creatables and am going to use one of her amazing (FREE) files to show you how to upload SVG images to Cricut Design Space! Kristin releases a new forever free design every Friday and often runs sales on her paid designs! It’s definitely worth it to be on her list!! Plus, all of her designs include SVG images, PNG clipart (perfect to use with the Print Then Cut feature) and an offset to make stickers!
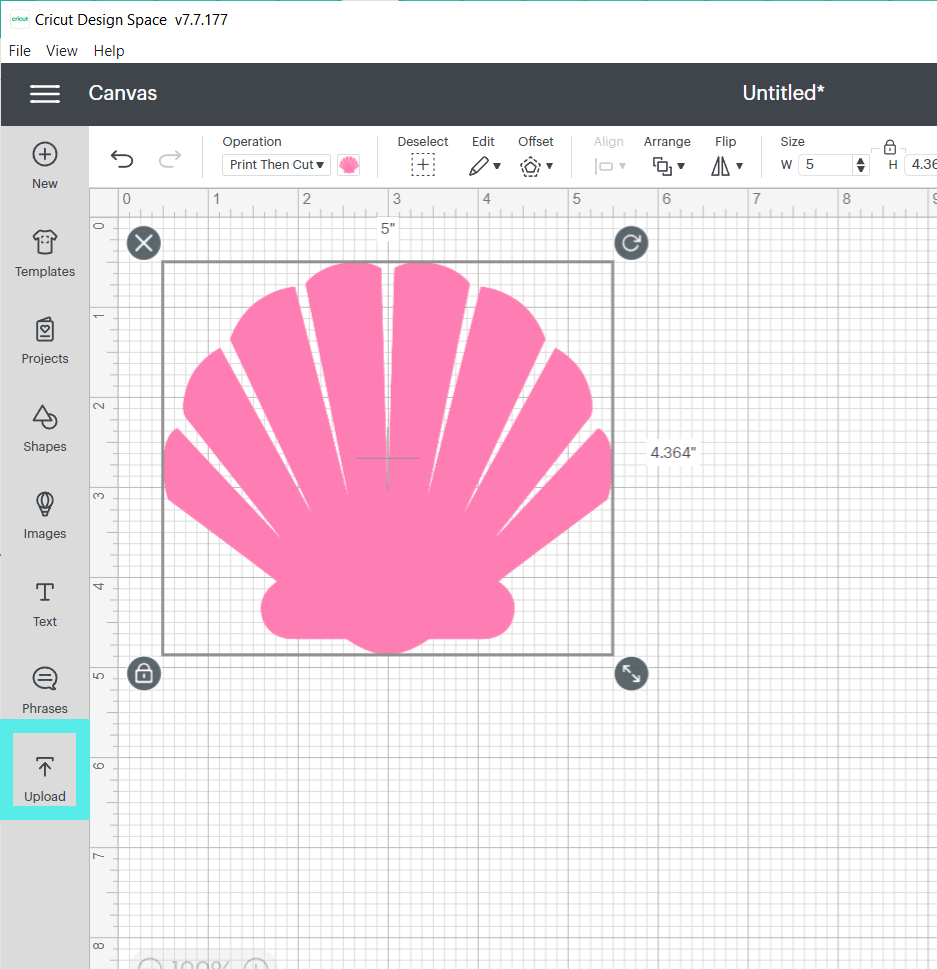
I think these seashells are so pretty and would look great on a shirt, cut out of card stock or for a vinyl project! Go here to grab these beautiful seashells for free!
2. Extract Your File If Needed
If your SVG is in a Zip file, you will need to extract it before you can upload the image to Cricut Design Space.
3. Open a New or Existing Project in Design Space
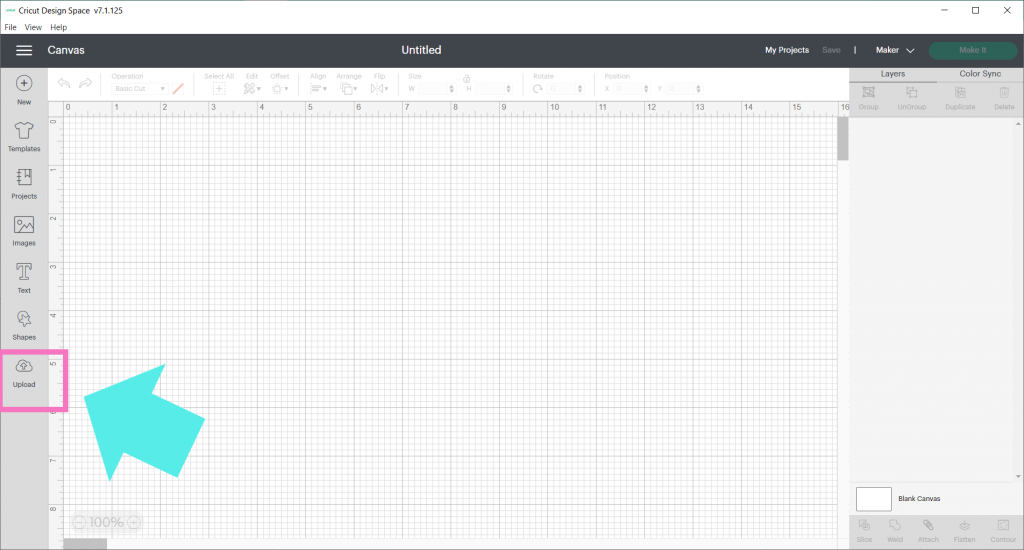
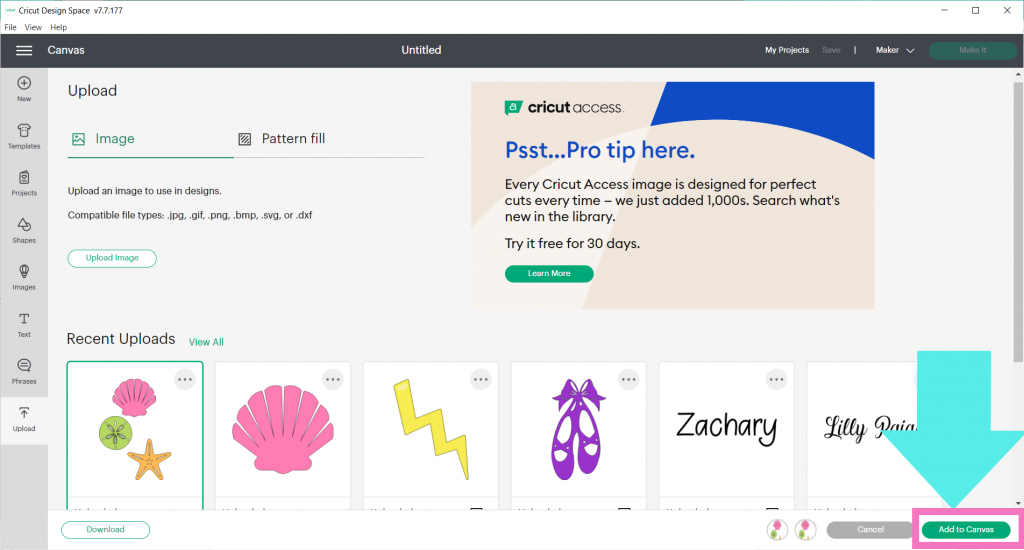
4. In a New or existing Project, click on Upload in the bottom of the left-hand menu.
5. Click on Browse Images and find the SVG image you want to upload to Design Space.
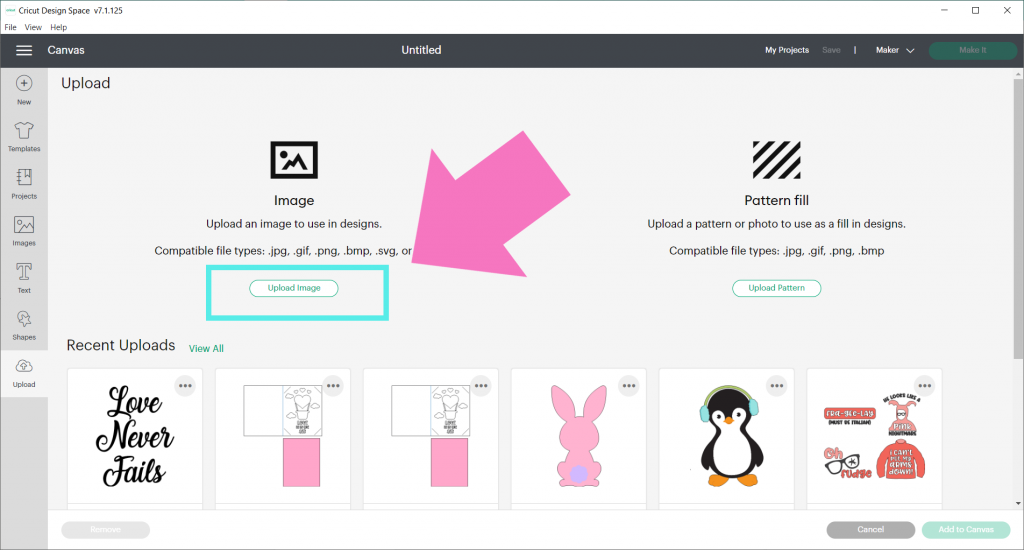
6. Add Tags if you would like. Tags are great for helping you search for images!
7. Then, select Upload.
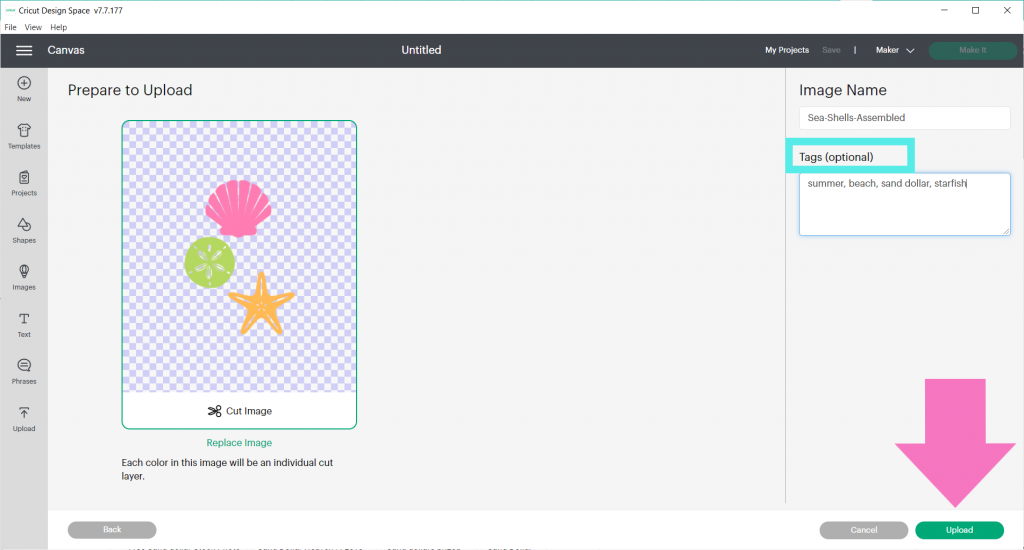
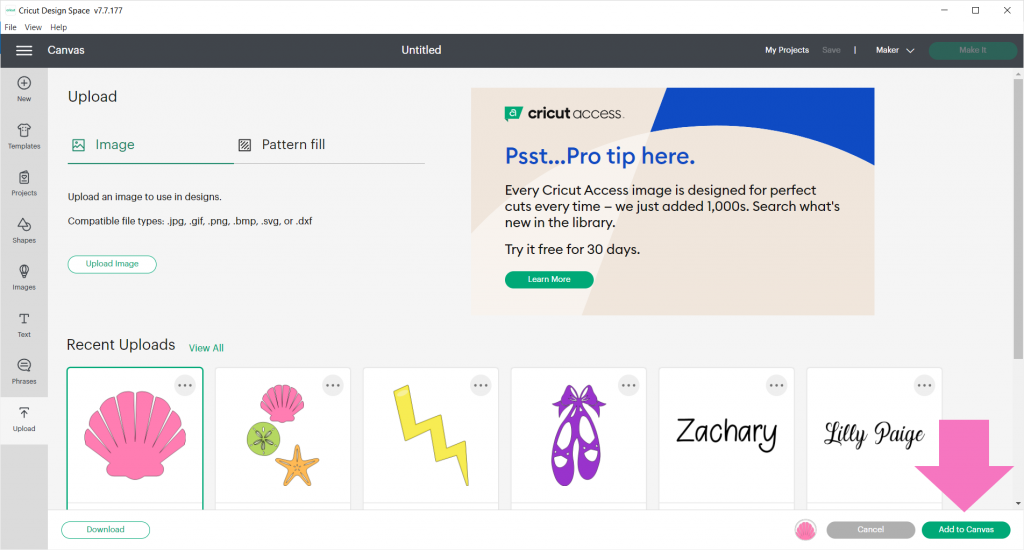
Your file will now appear in your Upload library!
8. Select the image(s) you want to work with and then click Add to Canvas. And that’s it!
Notes:
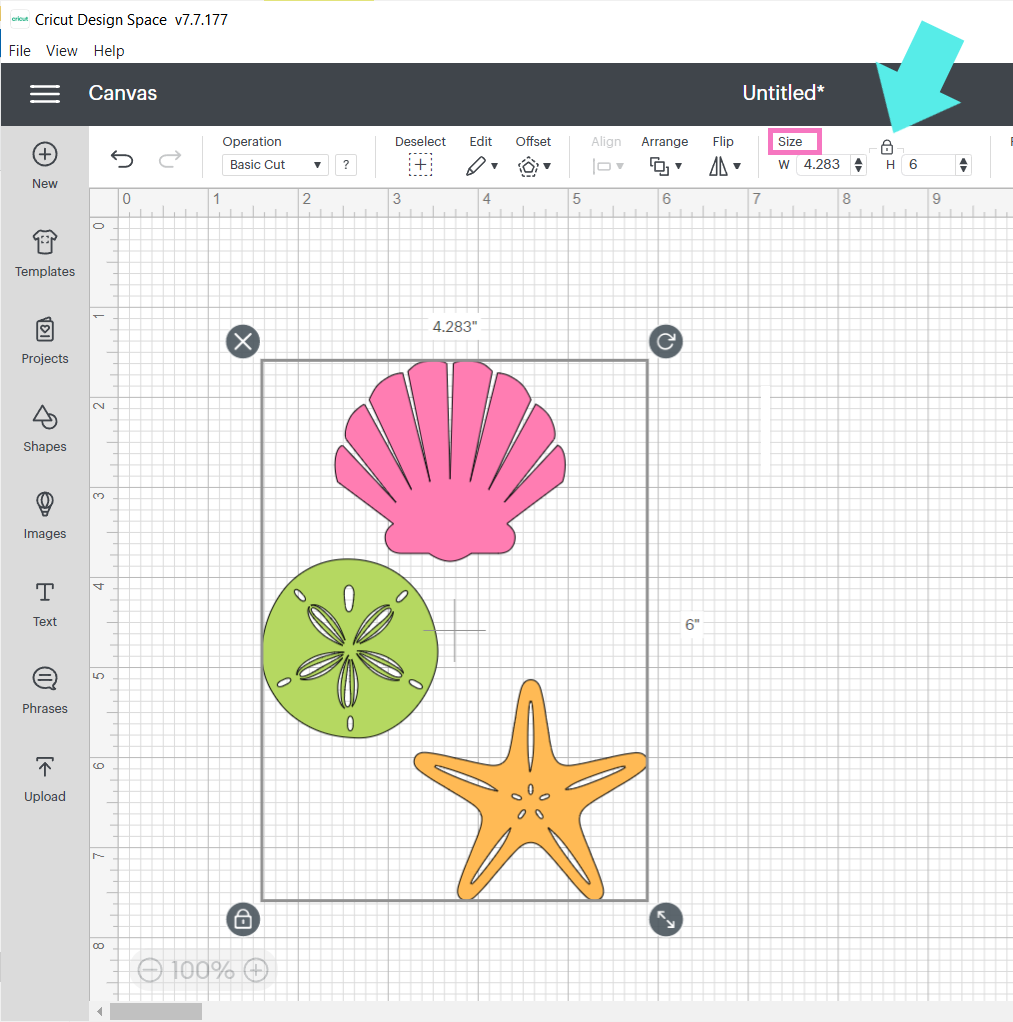
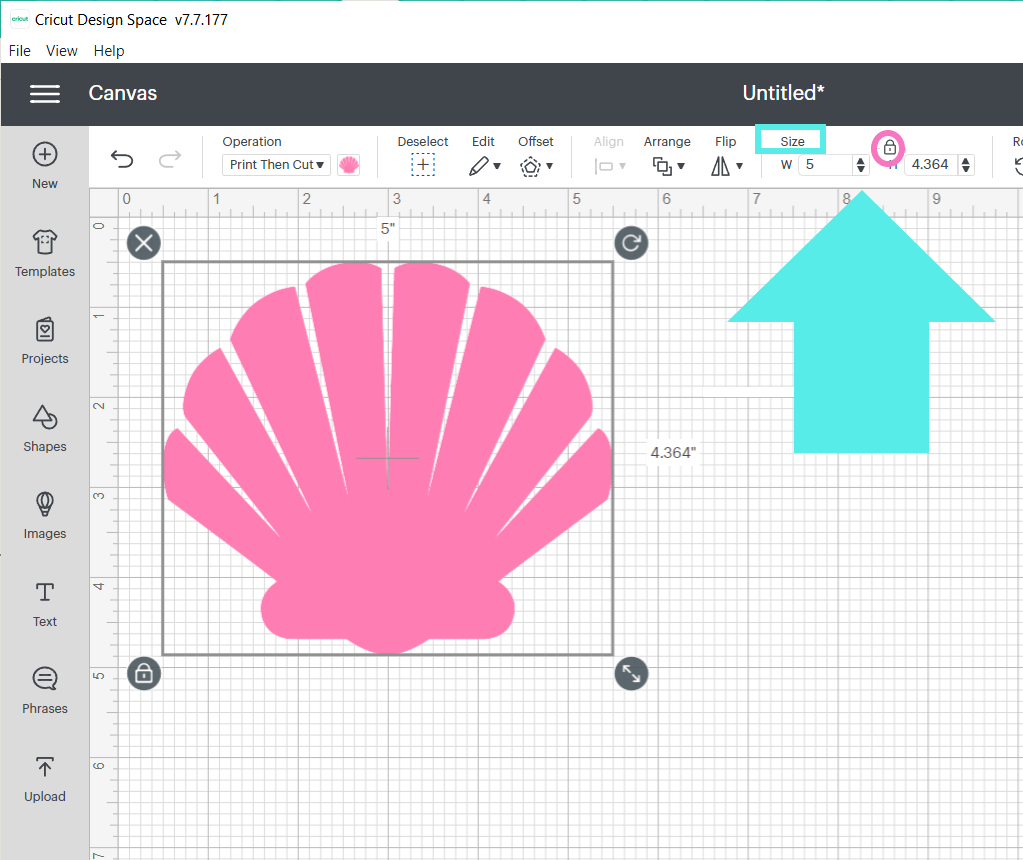
Sometimes, an image will come ridiculously big by default. Like really big, where it takes up the whole screen and you can’t see all of it.
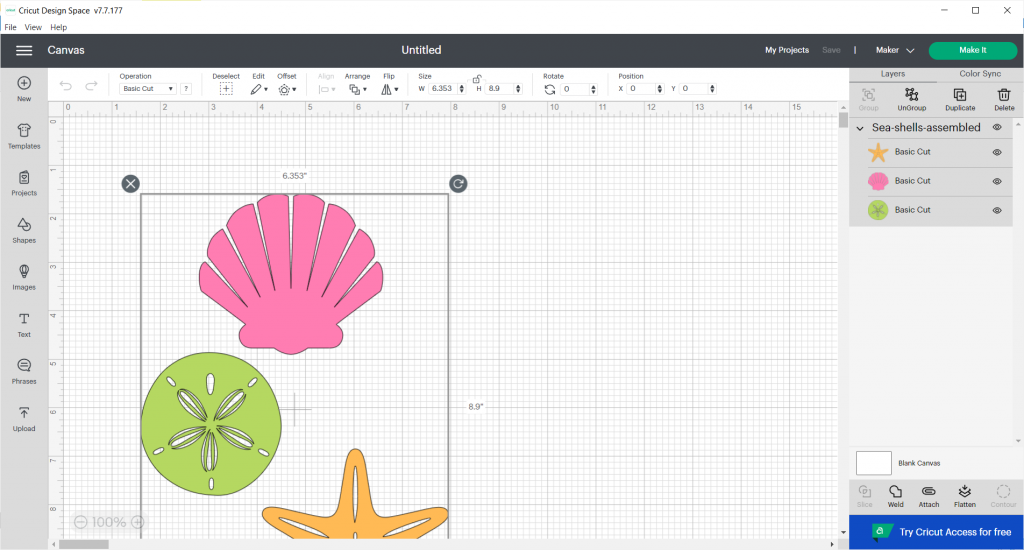
If this happens, just go up to size and make it smaller where you can see the whole thing on your canvas. Be sure the lock is set or the image will be skewed. Then you can play with what exact size you’d like from there!
How to Upload Images to Cricut Design Space for Print Then Cut: PNGs
Uploading PNG images to Cricut Design Space requires a few extra steps than SVG files. It’s important to note that PNG images will only have one cut layer, unlike SVG files which can have multiple cut layers.
The first few steps of uploading a PNG image to Design Space are the same as uploading an SVG file. However, there is one step here that is crucial! Follow along!
1. Download Your PNG Image
Make sure the PNG image you want to upload to Design Space is already saved to your computer.
2. Extract Your File, If Needed
Just like with SVG images, you may need to extract the file before you can upload your PNG image to Cricut Design Space. Make sure you’re saving your images in a place where you can easily find them!
3. Open a New or Saved Project in Cricut Design Space
In a New or Saved Project, click Upload in the bottom left-hand menu.
Find your image on your computer. I’m going to use the same sea shell image that I used before from Kristin’s site, except this time, I’m going to choose the folder that says PNG Clipart to find my image.
4. In the next screen, choose Complex and then Continue.
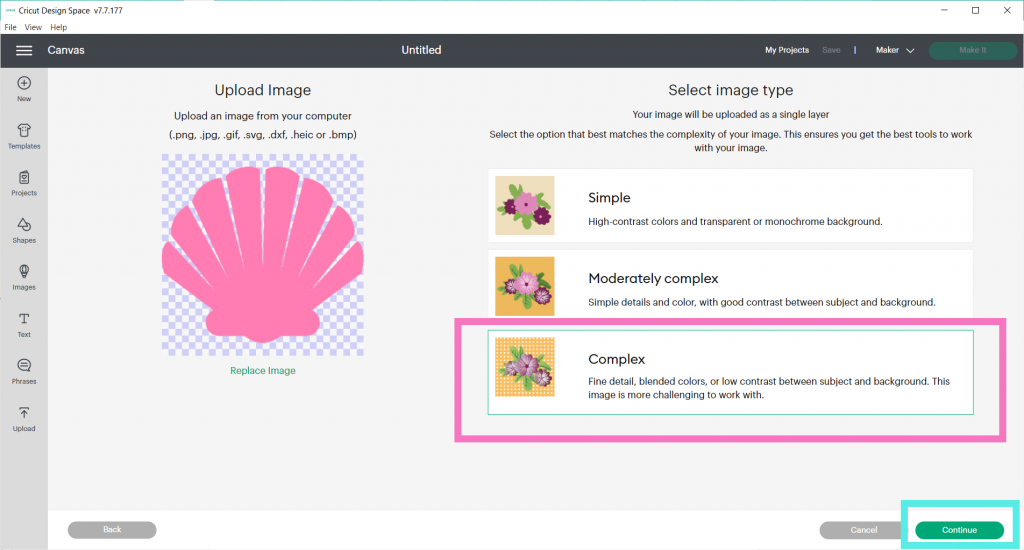
This is the crucial step when uploading images to Cricut to with the Print Then Cut feature!
6. Remove Background, If Needed. Then Select Apply and Continue.
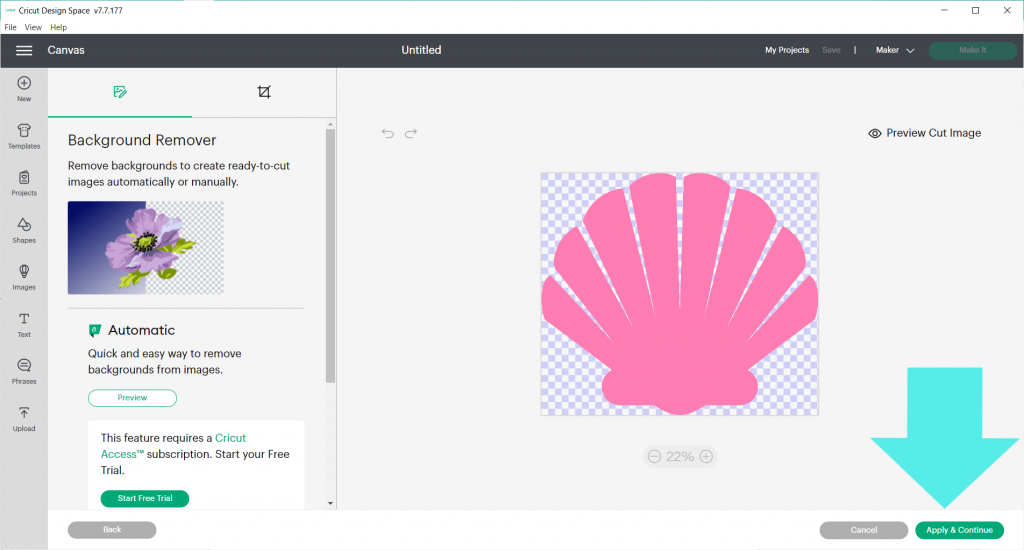
Most PNG files already come on transparent backgrounds, so you should not have to do anything here on this screen, except click “Apply and Continue.” This is also one of the reasons I love Kristin’s designs! She has already done the work to remove the background for you, so the image is pretty much ready to go!
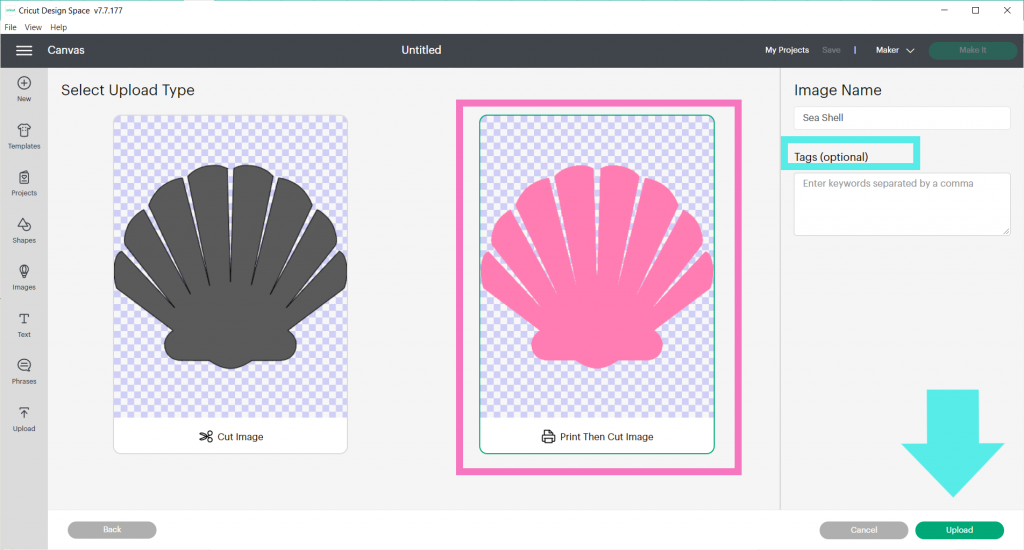
7. In the next screen, select Print Then Cut image. You can also add tags to help you search for images later. Then select Upload!
And that’s it! Just like your SVG file, your PNG image will now appear in your Upload Library!
8. Select the Image(s) You Want To Use and Then Select Add To Canvas. You’re done!
Notes on How To Upload Images to Cricut- PNGs:
Just like with the SVG image, your PNG image may appear ridiculously big when it appears on the Design Space Canvas.
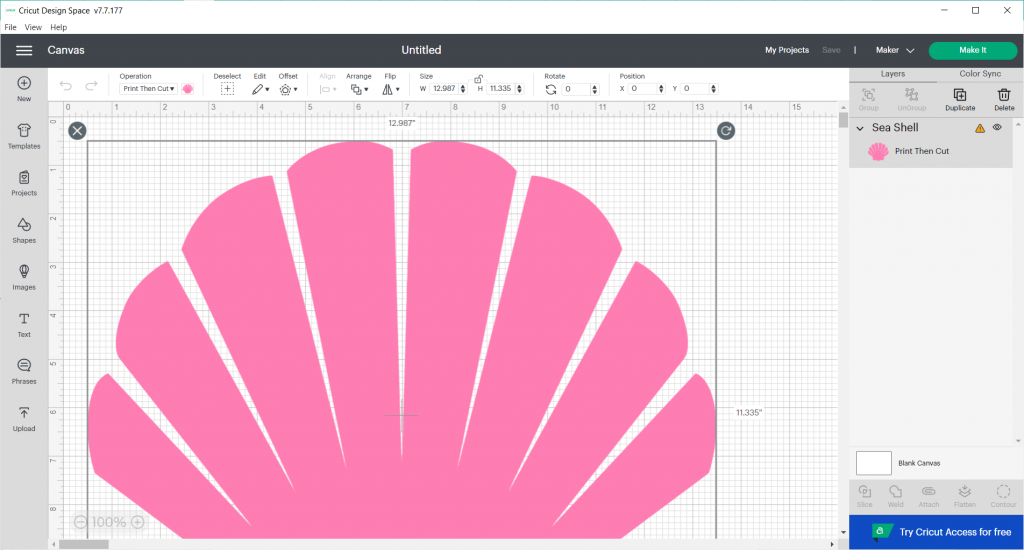
Again, just go up to size, make sure the lock is set and change it to something smaller so you can see it all on the screen. Then you can go back and get it the exact size you need from there!
And there you go! Those are the steps on how to upload SVGs and PNG images to Cricut Design Space!
In the future, if you want to find the files you uploaded, just click on Upload in a New or Existing Project and it will take you to your Upload library!