How to Cut and Apply Adhesive Vinyl with a Cricut
Learn the Basics of how to use Cricut Design Space to design and cut adhesive vinyl with your Cricut Maker or Explore machine and how to apply it with this step by step beginner tutorial- perfect for a busy mom!
One of the things that made me want a Cricut Explore machine back in 2016 was the ability to create custom adhesive vinyl projects. And since I had just a little girl that September, I had a ton of projects in mind! It took me a little bit to figure out what I was doing, but I eventually got the hang of it. Turns out, I was doing it all wrong with my Cricut Expression!
So now I’m here to help you learn to cut adhesive vinyl with your Cricut Explore or Maker so that you don’t have to struggle like I did! Today we have another simple project that can be done in about 30 minutes! Not only will you walk away with a fun project when we’re done, but you’ll also be more familiar with your machine so that you can start making all those adhesive vinyl projects on your list too!
This post may contain affiliate links for your convenience. If you purchase something through the link, I may receive a small commission at no additional cost to you. I only recommend products I know and love!
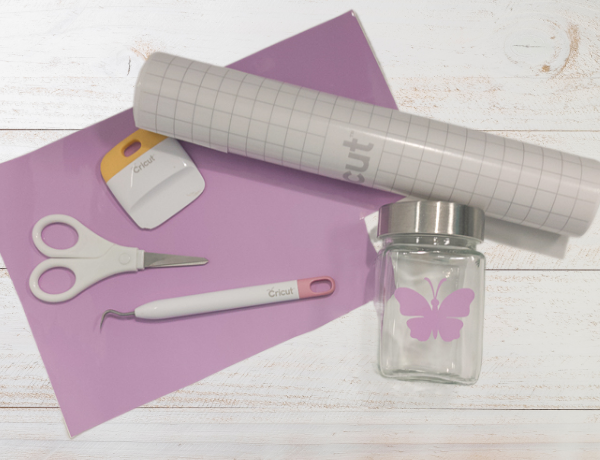
Materials Needed:
- Glass Jar– washed and ready to go!
- Adhesive Vinyl (I’m using Oracal 651, which is permanent, outdoor vinyl)
- Standard Cricut Mat
- Fine Point Blade
- Cricut Machine
- Scissors or Paper Trimmer
- Burnish Tool
- Weeding Tool
- Transfer Tape
Download Your Design:
Today, I’m using a FREE SVG from one of my favorite sites! Kristin has tons of freebies on her site and releases a new one each week! She often runs sales on her paid designs too, so it is well worth it to be on her email list! Go here to grab these beautiful butterfly SVGs for FREE!
Once you’ve downloaded your file, locate it on your computer and extract the zip file.
Design Your Adhesive Vinyl Project:
Open Cricut Design Space and select New Project.
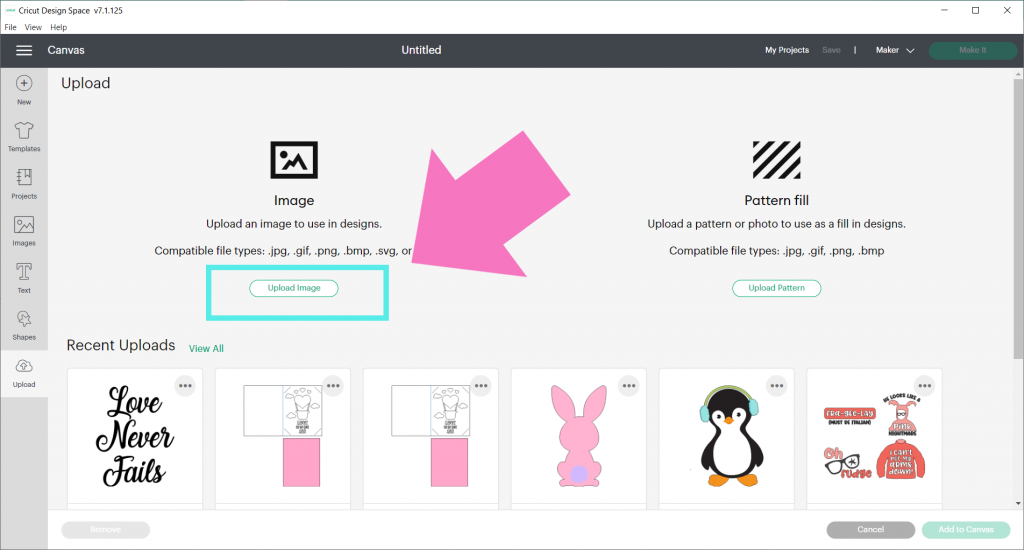
Next, click on UPLOAD in the bottom of the left menu.
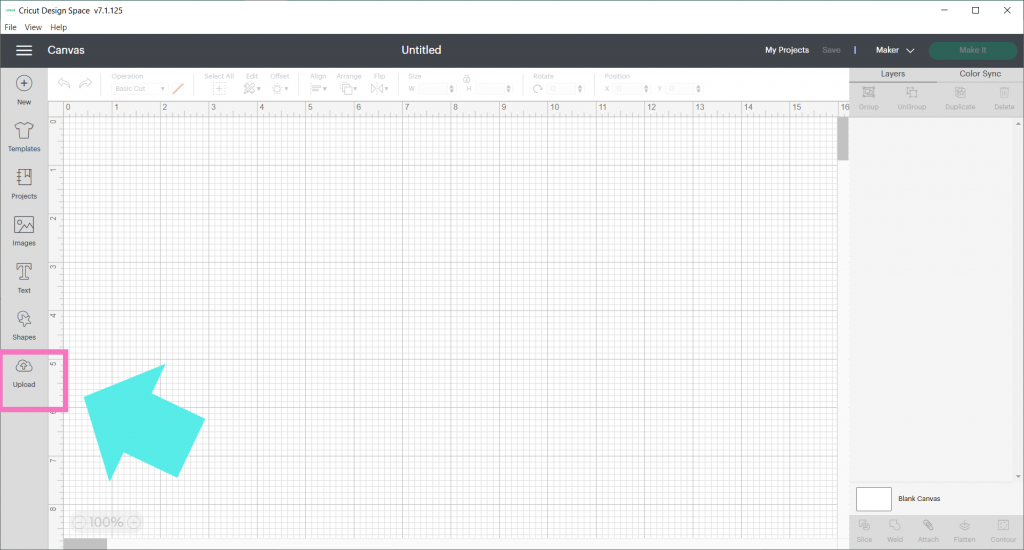
Then, select Upload Image on the next screen.
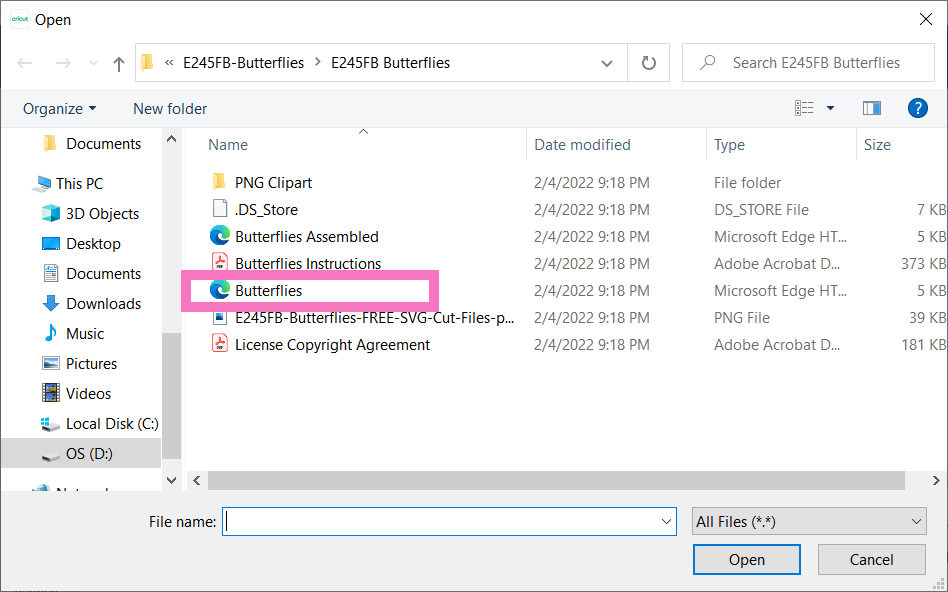
Find where you saved your butterflies SVG and choose the butterflies file.
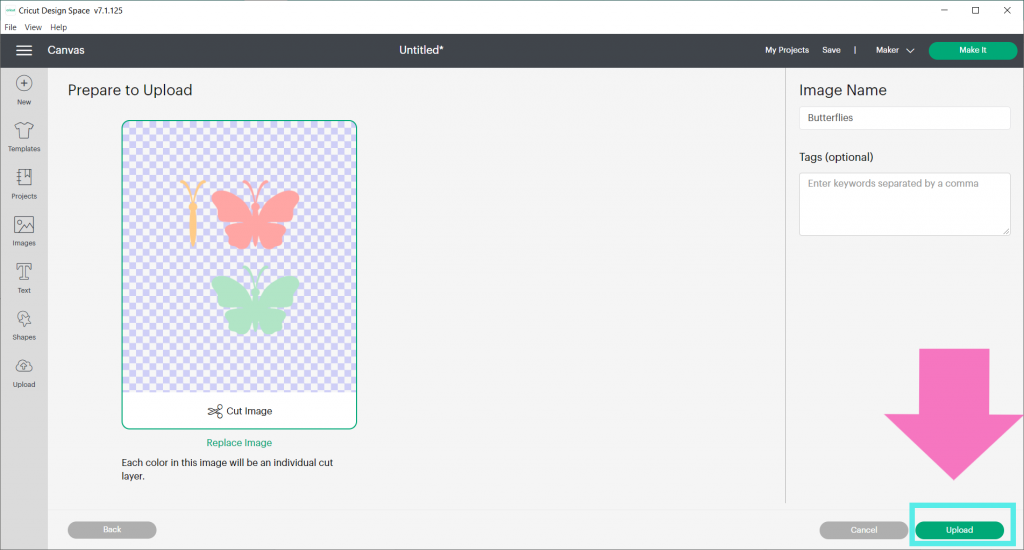
Click on Upload in the bottom right corner.
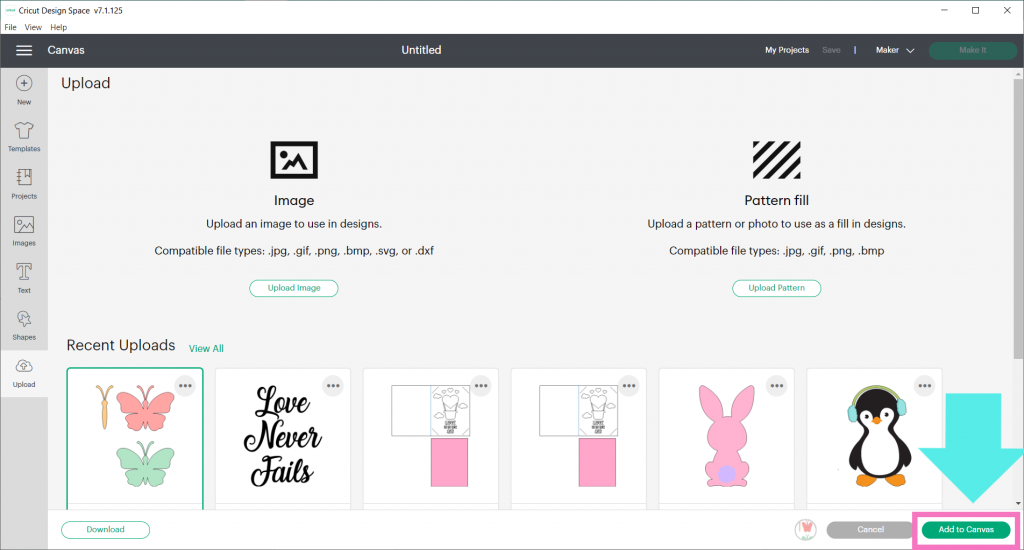
Your new uploaded image will already be selected. Hit Add To Canvas in the bottom right corner.
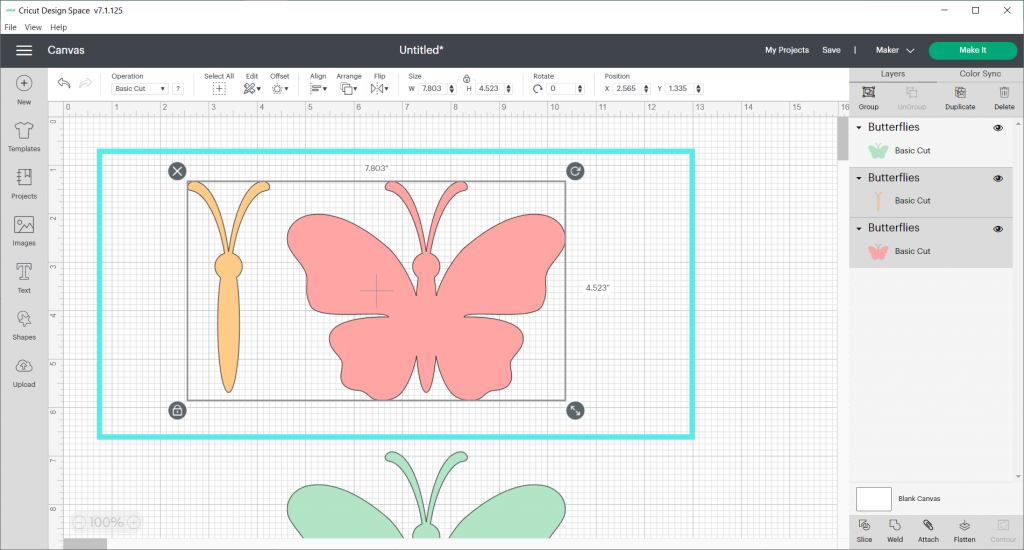
Okay, now that our image is on the canvas, it’s time to start designing! The first thing we need to do this image is UnGroup it. Click on UnGroup in the Layers Panel on the right hand side of the screen. This will allow us to work with each element separately.
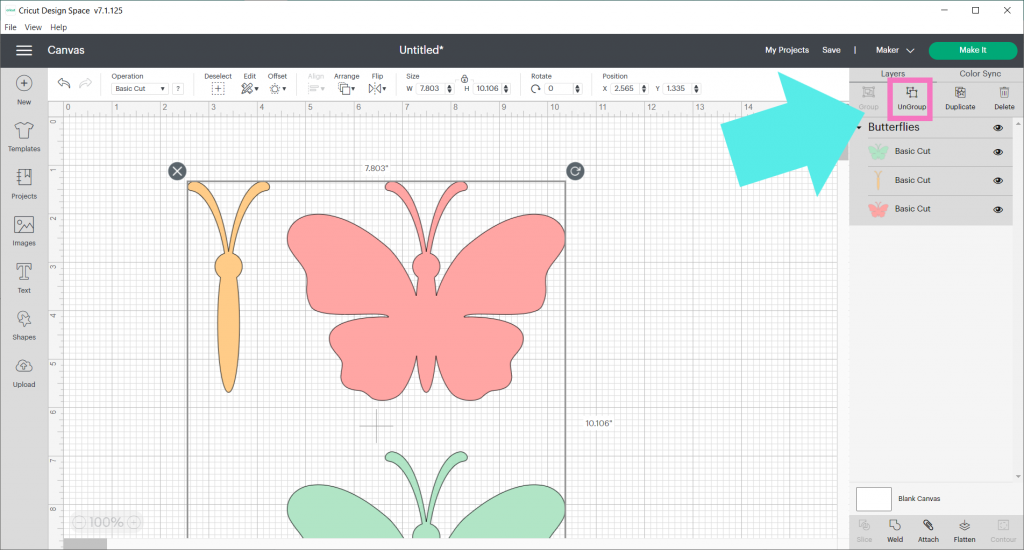
Since we’re just working with a single layer in this post, go ahead and delete the pink butterfly and the yellow body. To do this, hold the left click of your mouse down, while dragging the touch pad to make a box around the two layers. Then press delete or backspace.
Now we’re left with the single butterfly for our adhesive vinyl project.
Resize Your Design:
Resize your butterfly to fit on your jar or whatever you are using. To do this, go to Size in the middle of the top menu bar. Simply highlight the current numbers in the box and insert the new size.

For my pencil jar, I’m changing the butterfly’s height to 1.5.
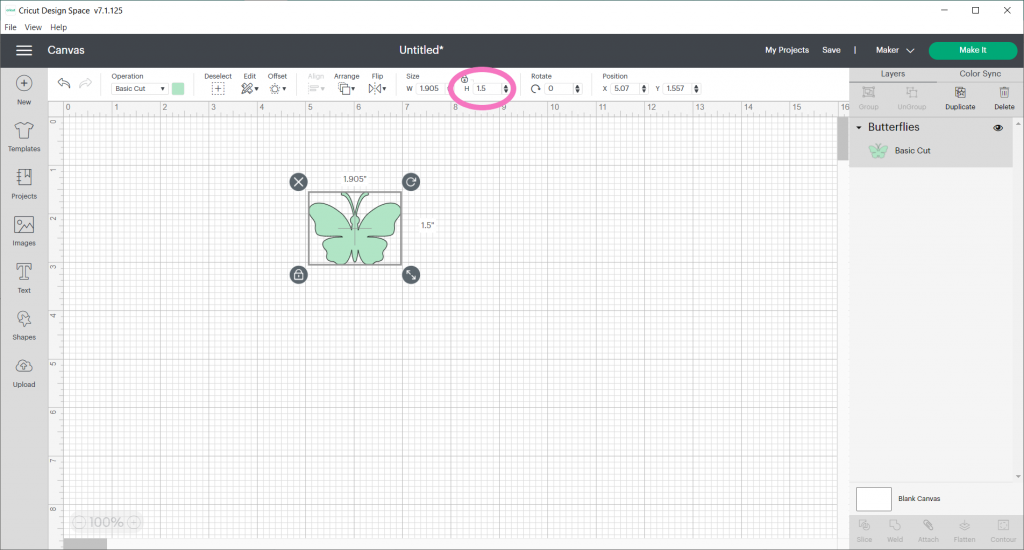
Notice the width also changed when we changed the height. Go back with your ruler to your jar and make sure that your butterfly will fit both ways!
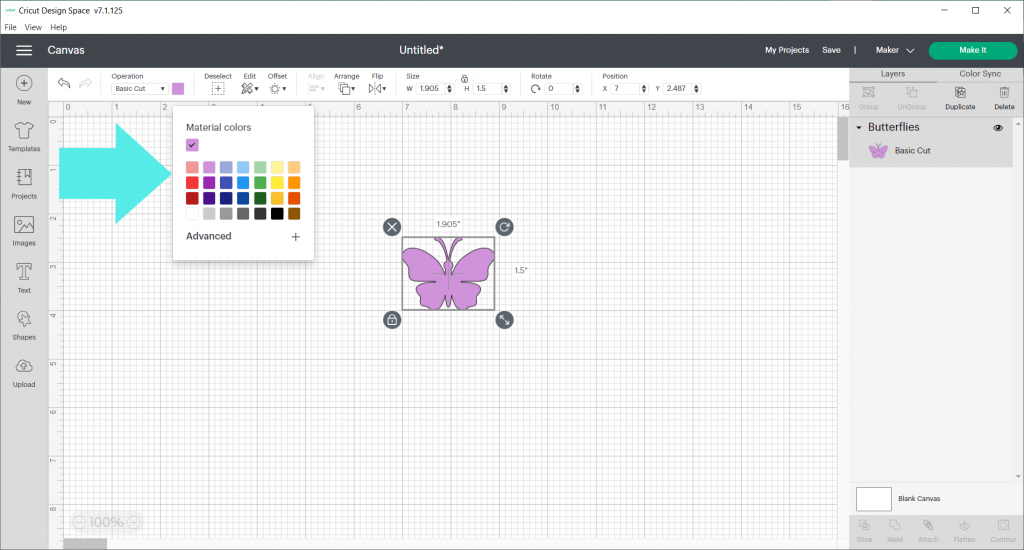
Next, change the color of your butterfly to the color you will actually be cutting out of adhesive vinyl. To do this, go to the little colored square in the upper left side of the top menu.
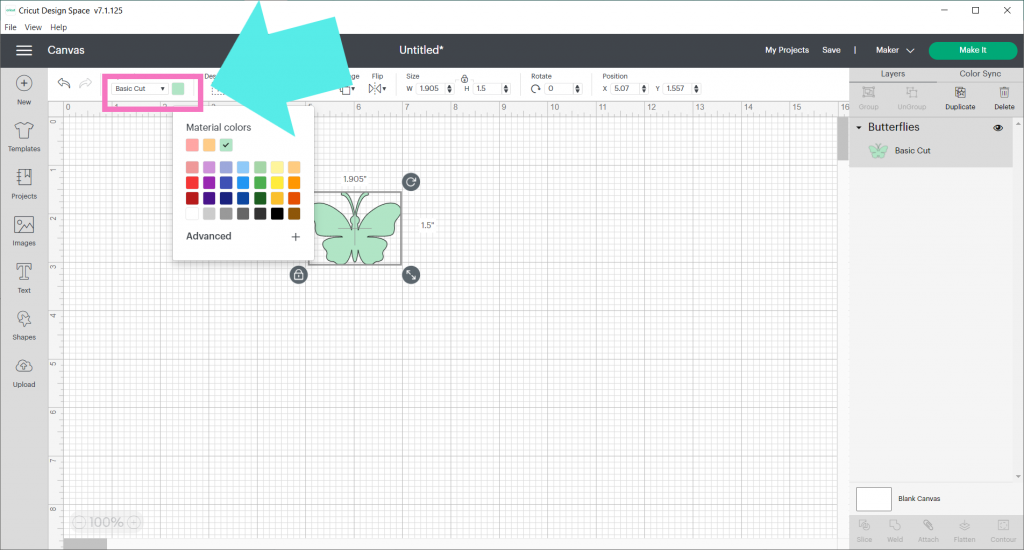
Find the color that’s closest to your material and select it. This is just for visual purposes, since this is a single layer project. Also, don’t worry if Design Space does not have your exact color or shade. Your Cricut machine will cut whatever material you put on the mat, regardless of the color on the screen.
Okay, that’s it for designing this project!
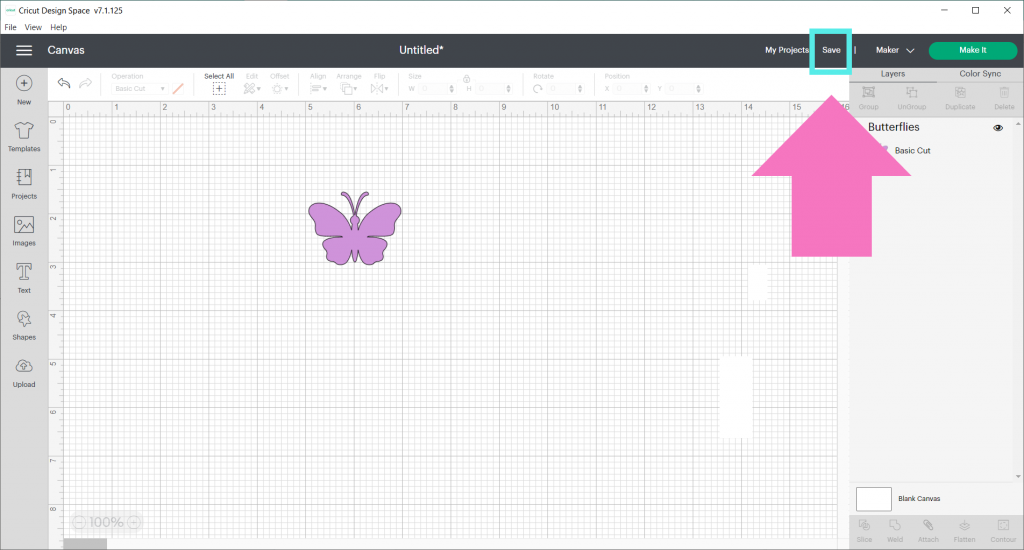
Before we go to make our adhesive vinyl project, let’s go ahead and save it!
Click on Save in the top upper right hand menu.
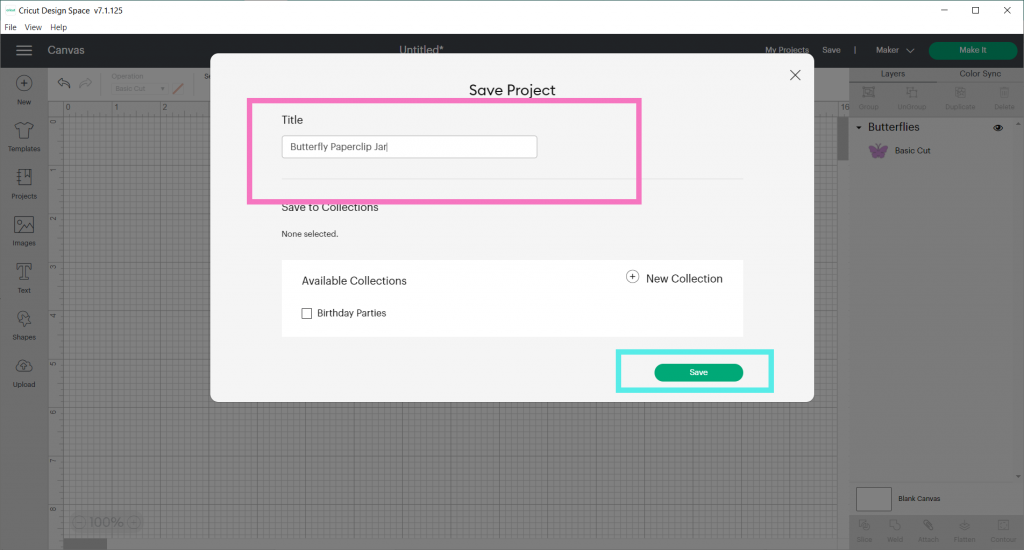
Give your adhesive vinyl project a title and click Save!
Let’s Make It!
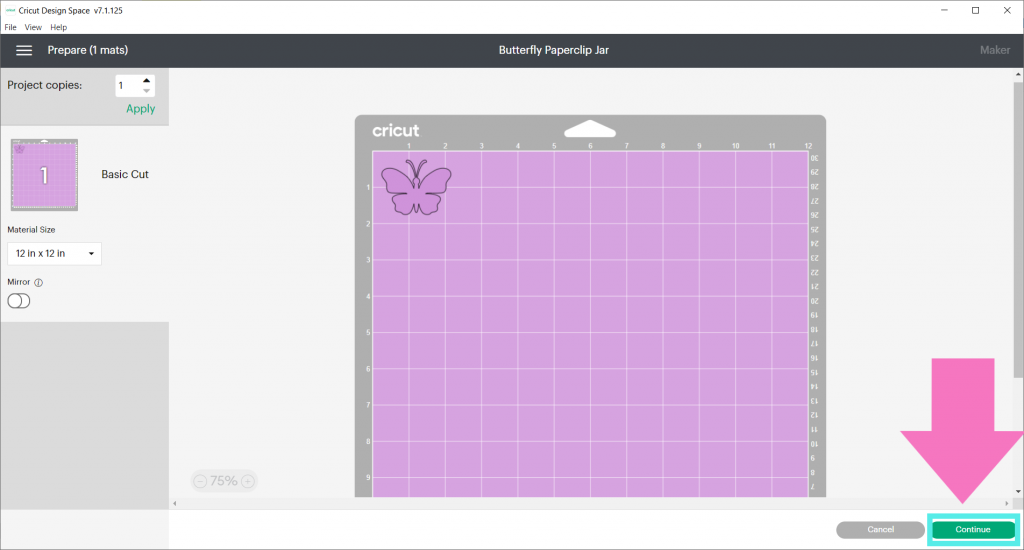
Now, we’re ready to cut our adhesive vinyl project! Click on Make It in the upper right hand corner.

Next, make sure your machine is either connected via Bluetooth or connected with a USB. Check out Cricut’s tutorial here on how to pair your Cricut Explore or Cricut Maker Via Bluetooth.
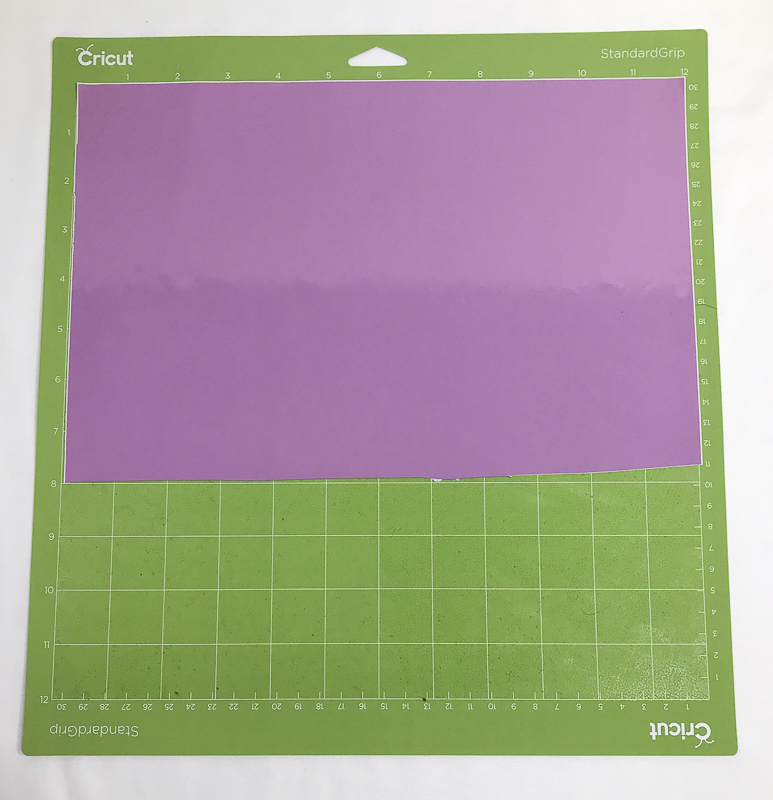
Grab your mat and adhesive vinyl. Position your adhesive vinyl on your mat, with the color facing front (paper side down). Smooth out any bubbles with your hands.
Click Continue.
Now, we need to choose our cut setting for adhesive vinyl. For Cricut Explore, turn your dial to Vinyl.
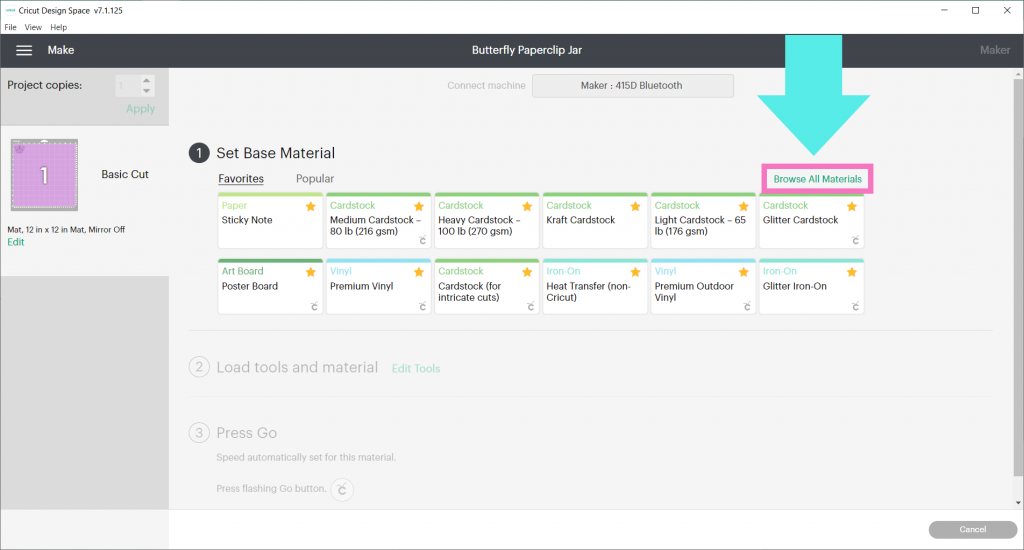
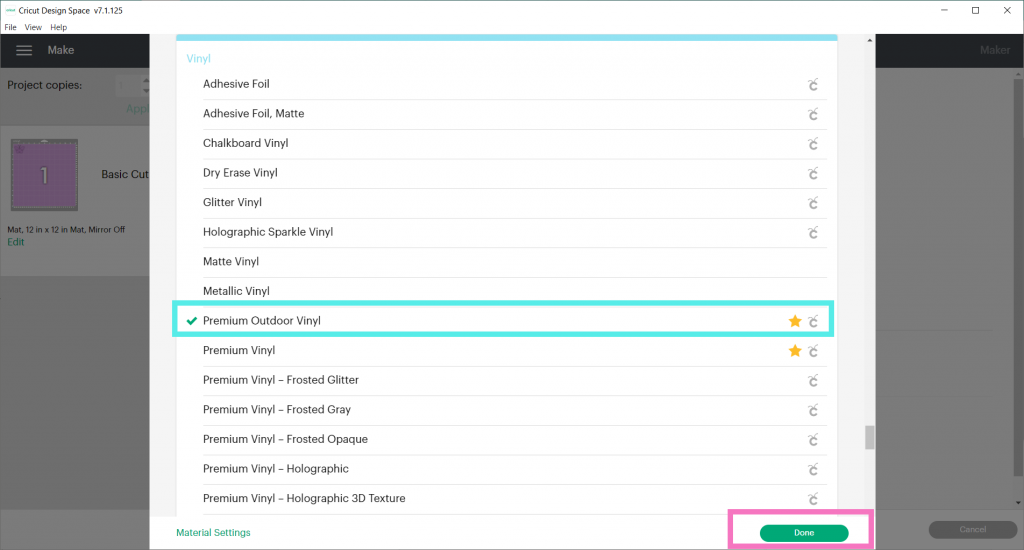
For Cricut Maker, click on Browse all Materials.
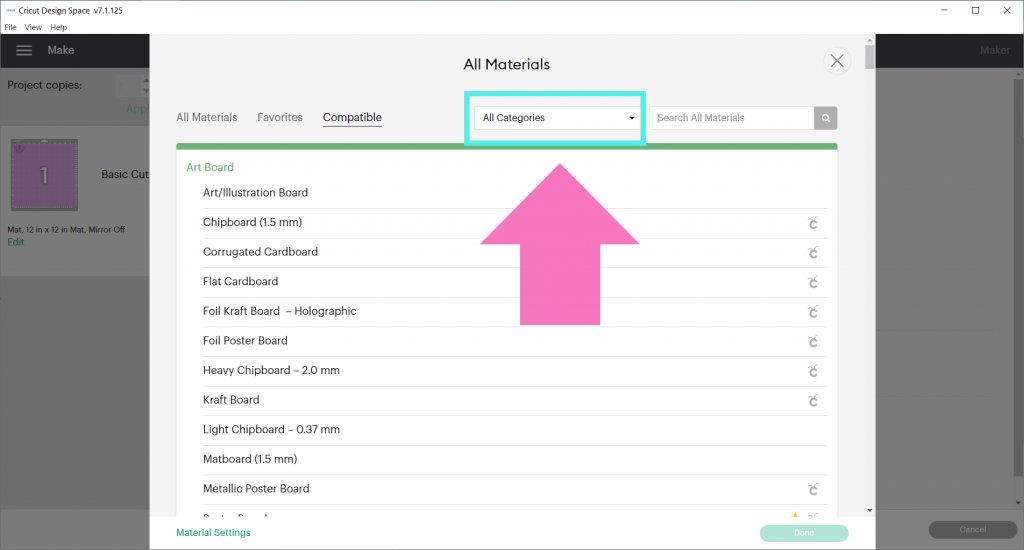
Click on All Categories.
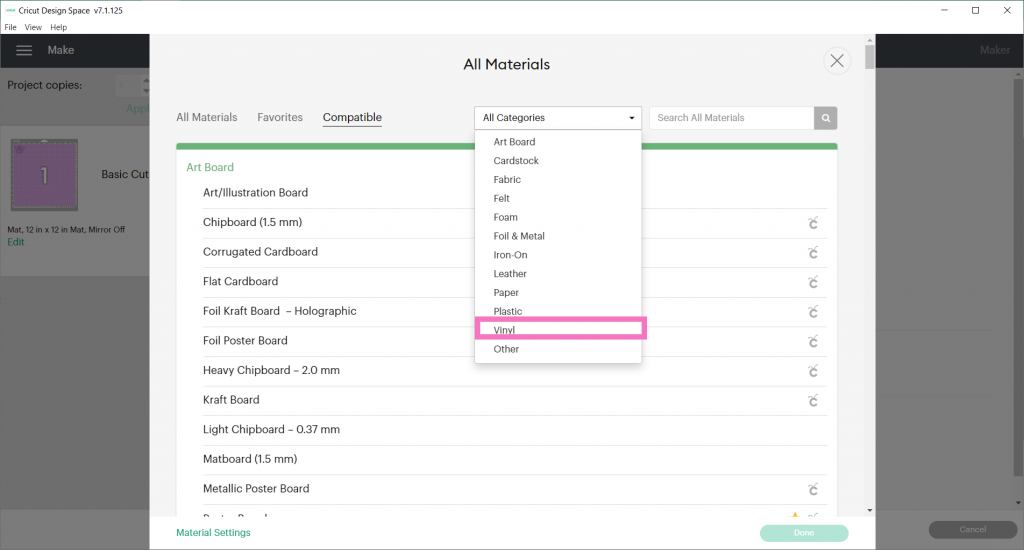
Select Vinyl.
If you are using Oracal 651 or an outdoor vinyl, choose Premium Outdoor Vinyl. Click Done.
If you are using Cricut Removable Vinyl, Cricut Vinyl, Oracal 631 vinyl or another brand of indoor/removable adhesive vinyl, then choose Vinyl (It’s the very last one- scroll down!). Click Done.
(Note: ALWAYS do a small test cut of your material first if you are unsure of your setting. Once you’ve figured out the best setting, write it down for next time!)
If you are using a different type of vinyl – chalkboard, adhesive foil, holographic, etc- check out Cricut’s Help Center on Vinyl to see their recommended cut settings for both Cricut Explore and Cricut Maker machines.
Load your Cricut mat into your machine by pressing the blinking load button.
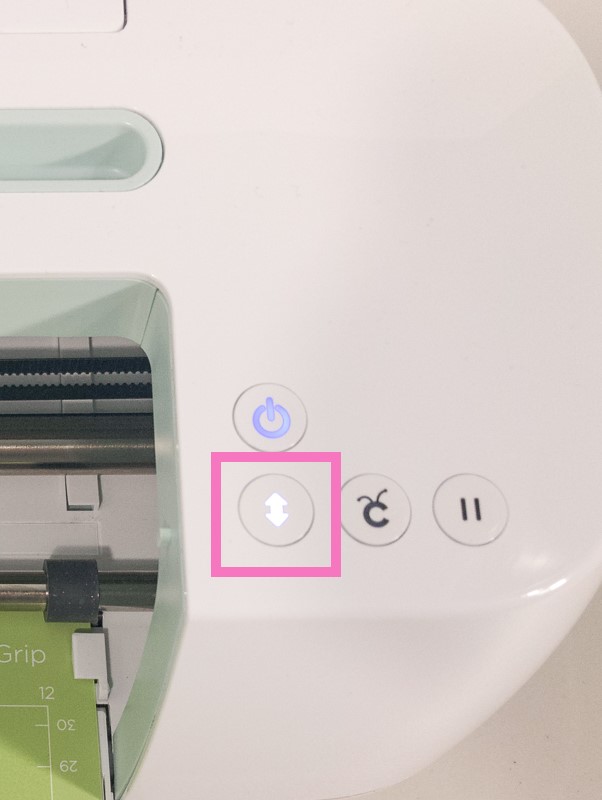
Press the blinking Cricut cut button once it starts to blink. Sit back and wait for your Cricut to work it’s magic!

When the machine is done, press the blinking unload button to release your mat revealing your newly cut design!
Weed Your Adhesive Vinyl Design
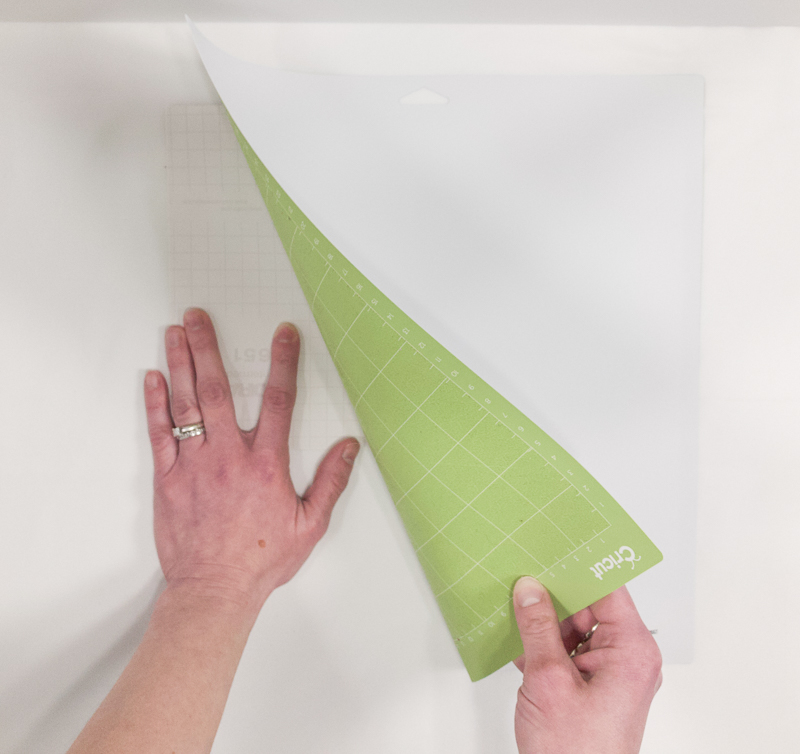
The next step is to weed your material! Weeding is removing all the excess material in your design that you don’t need. First, remove your adhesive vinyl from your Cricut mat.
HOT TIP: Remove your adhesive vinyl from your mat. To do this, put your hand on your vinyl on a flat surface and remove the mat from the vinyl- instead of peeling the adhesive vinyl off the mat. This prevents your material from curling!
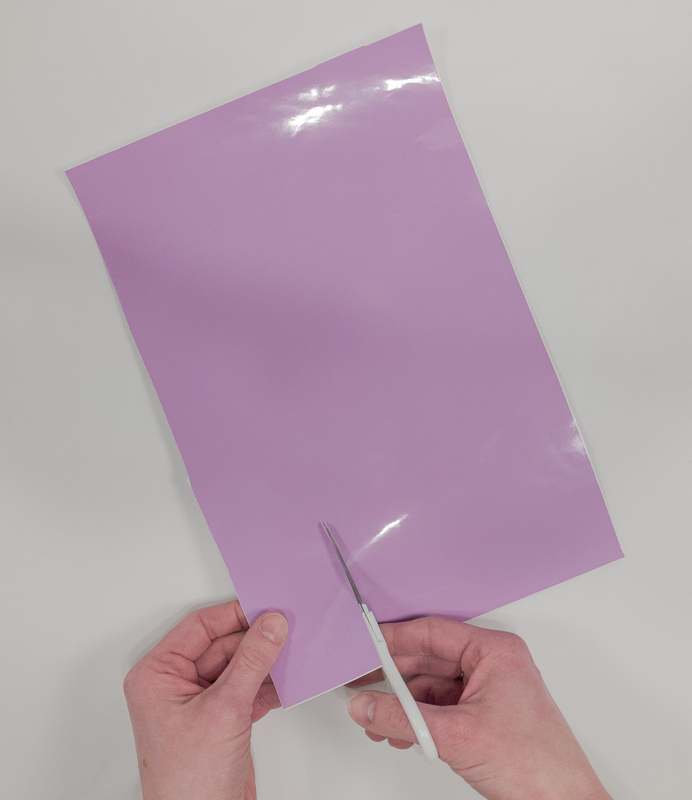
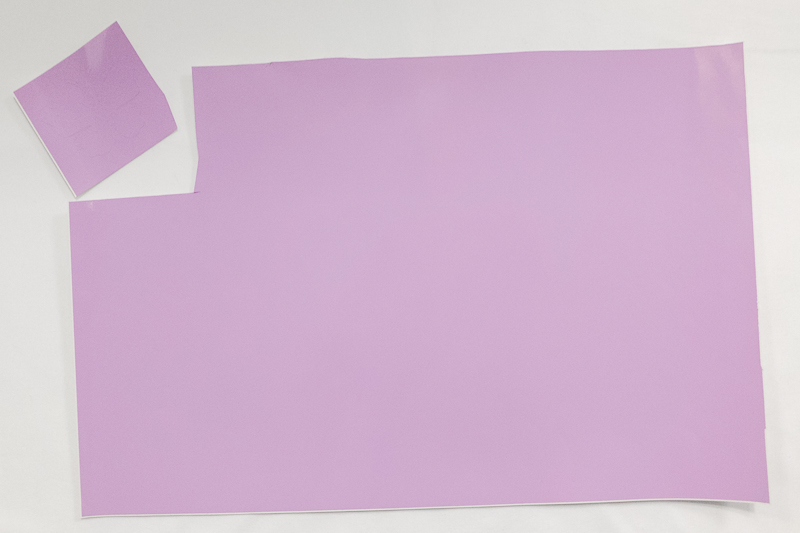
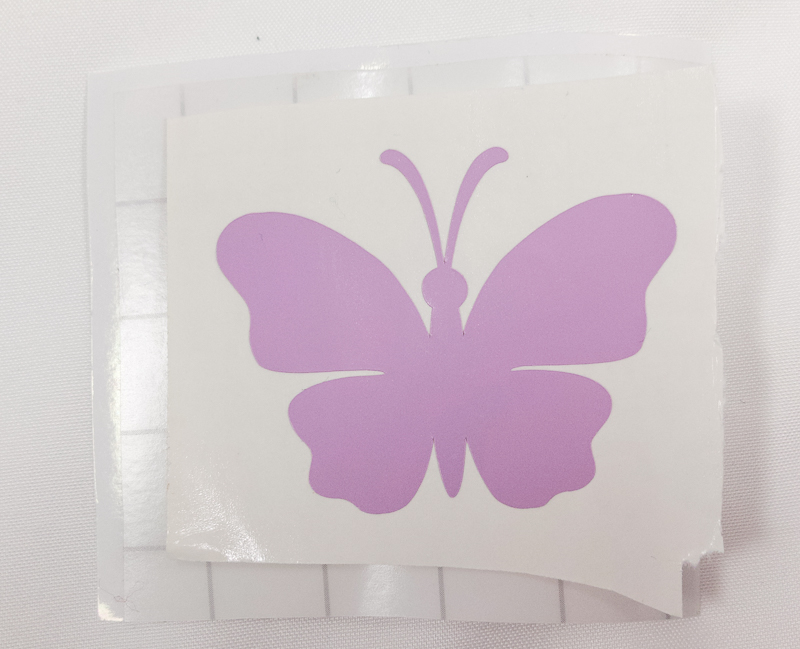
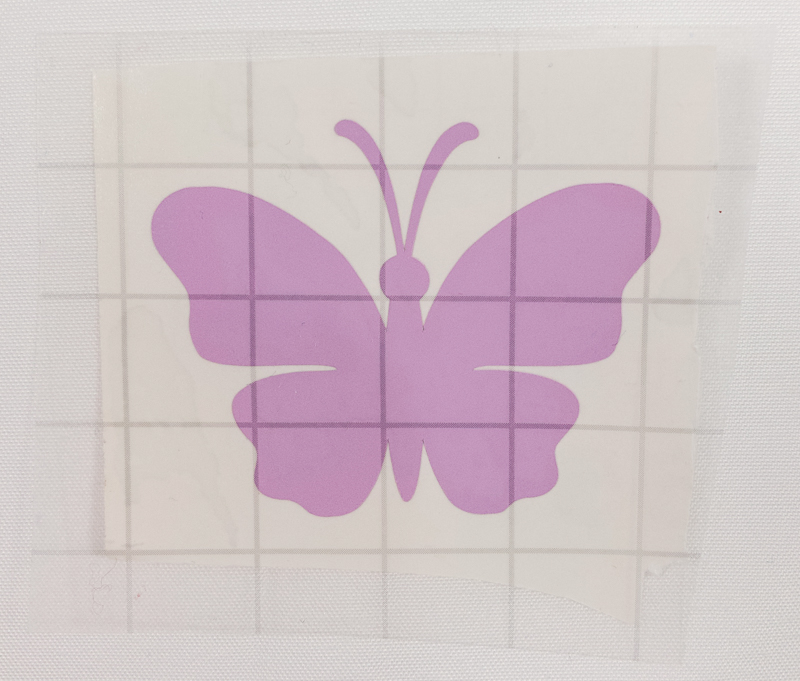
Next, find your design and cut the leftover adhesive vinyl with scissors, a paper trimmer or an Xacto Knife. You can cut a straight line down and then across, leaving 2 pieces of scraps, or you can just cut out the section with the butterfly. Your leftover vinyl will be an odd shape, but it is still completely usable!
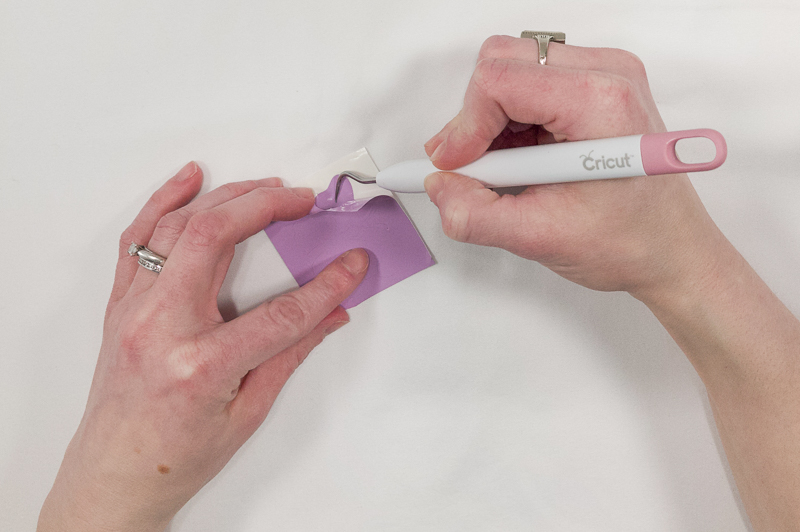
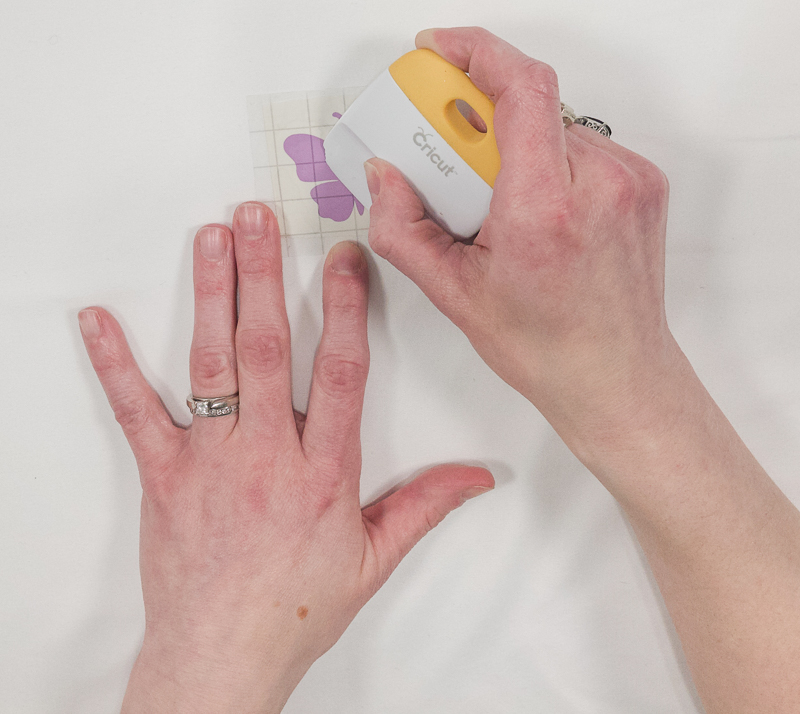
Insert your weeding tool into the top corner of your design and gently lift up the excess adhesive vinyl.
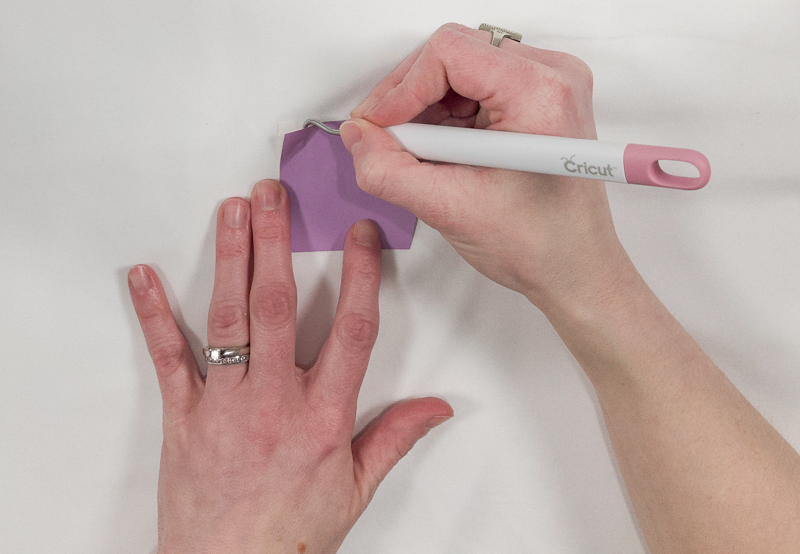
Once you have a good portion started, use your hand to pull up the excess adhesive vinyl. Use the flat part of the weeding hook to hold down the design while using your hand to lift up. Be super careful and go slowly around delicate parts of a design.
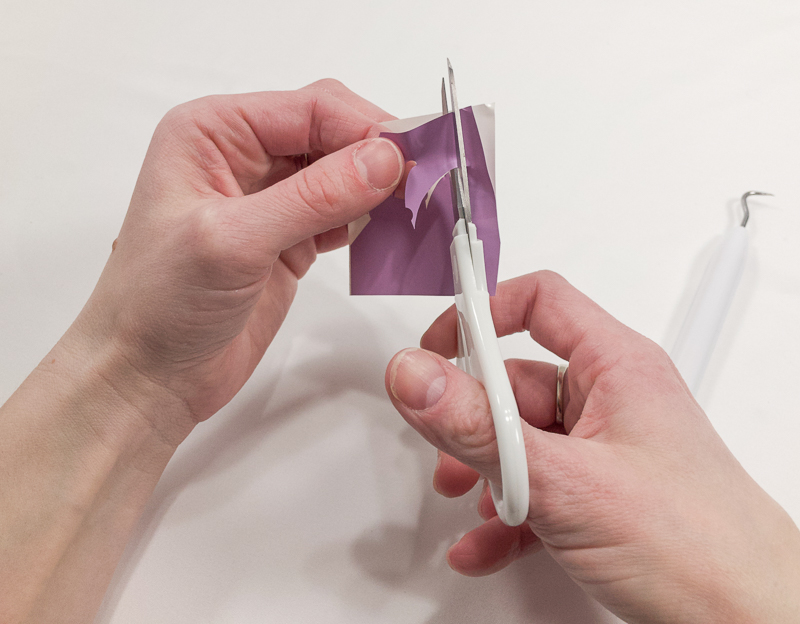
Use scissors to cut big chunks of weeded vinyl. This will help get it out of the way as you weed the rest of your design.
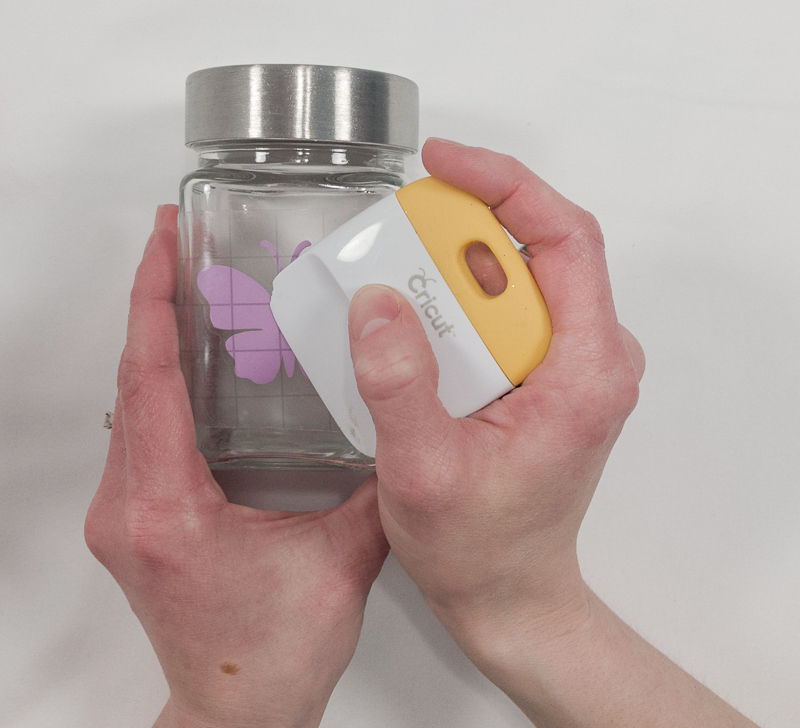
Burnish Your Adhesive Vinyl
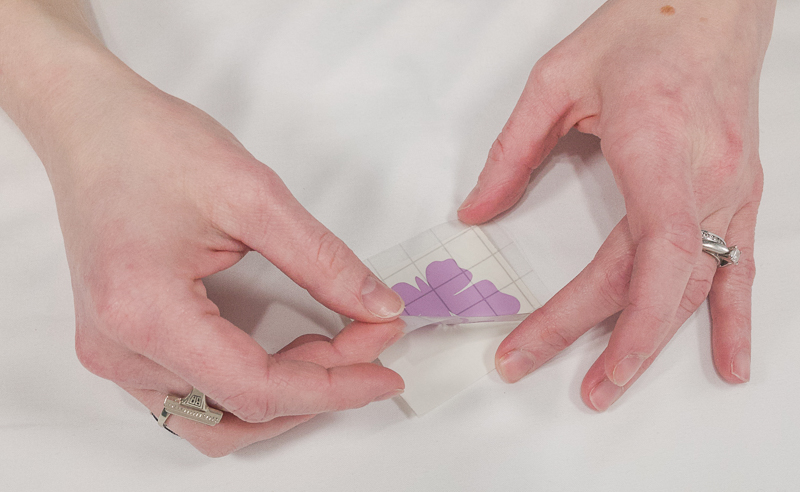
After you’ve weeded all your excess material, grab your transfer tape! Cut a piece of transfer tape a little bigger than your butterfly.
Now, peel the backing off of the transfer tape and place it on top of your butterfly.
Next, burnish the transfer tape on top of your butterfly. Burnish means to rub really hard. You can use the Cricut scraper tool or even a credit card will work! Then, turn it over and burnish the back.
Apply Your Adhesive Vinyl
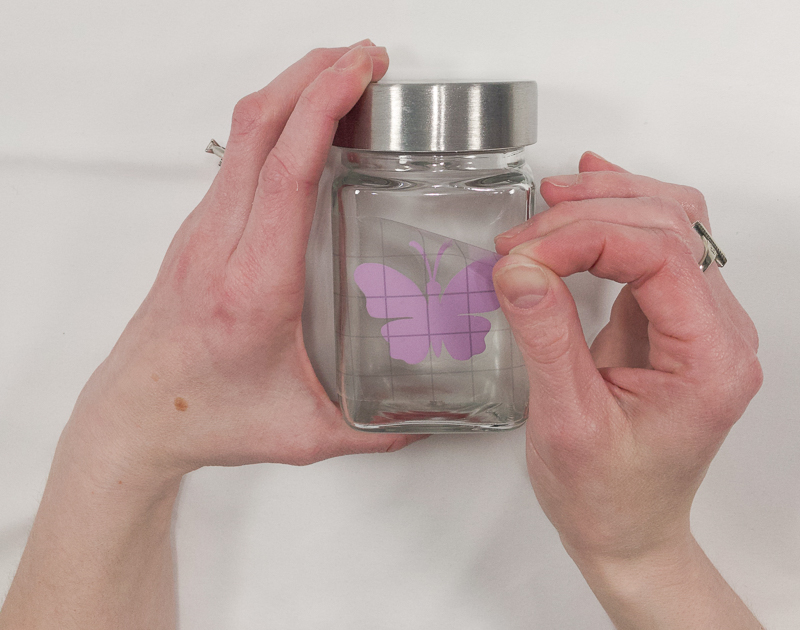
Now, it’s time to apply it to your jar! Slowly, peel off the transfer tape.
Now you’re left with your design and transfer tape.
Take your design and place it where you want it.
Then burnish again on top of the transfer tape to adhere your design.
Slowly lift up the transfer tape to see if your adhesive vinyl design stuck to your jar. If any of it is lifting up, place the transfer tape back down and burnish again!
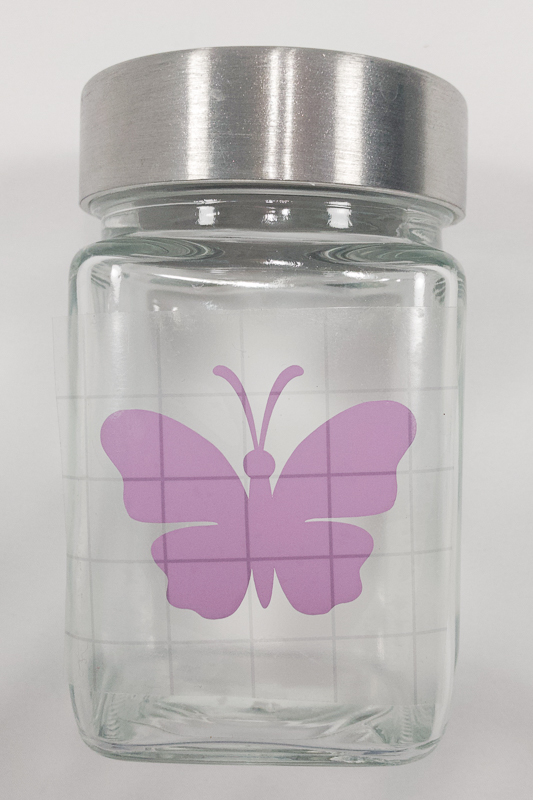
Once your design is transferred, slowly remove the transfer tape, and voila! Your jar is finished!
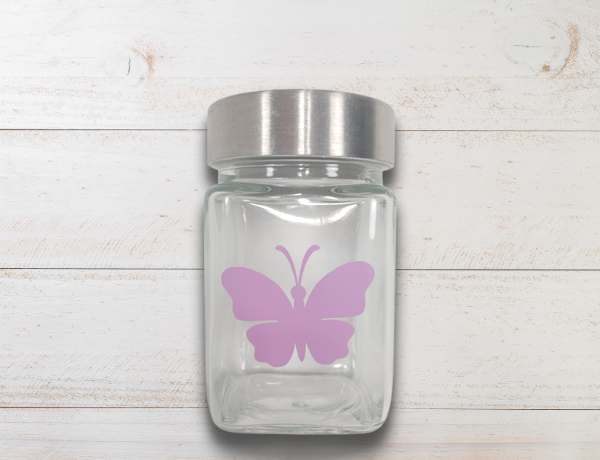
And that’s it! Those are the basic steps for designing, cutting, weeding and applying a single layer of adhesive vinyl!
Now that you know the basic steps of working with adhesive vinyl, what other designs and projects are you going to make? Tell me in the comments!
Have a Cricut question or tutorial you’d like me to write on? Let me know! I’d love to help!