How to Print and Cut Cardstock with Cricut Machines
Curious how to print and cut cardstock with your Cricut? Need a last minute card? Keep reading and I will tell you all about using Cricut’s Print-Then-Cut feature with cardstock to create a fun card in this quick tutorial!
I love to make and receive cards, but let’s face it- as a busy mom I don’t have a lot of time to make fancy, layered image cards like I used to. But thanks to the Print-Then-Cut feature, I can usually find time to print and cut cardstock with my Cricut!
In fact, this has become my go to for cards over the last couple of years! It’s pretty easy and I also love to embellish the card. Plus, it’s a great craft project you can do with kids!
This post may contain affiliate links. If you purchase something through the link, I may receive a small commission at no additional cost to you. I only recommend products I know and love!
Materials Needed:
- 8.5 x 11 White Cardstock
- Cricut Machine
- Standard Cricut Mat
- Cricut Fine Point Blade
- Cricut Spatula
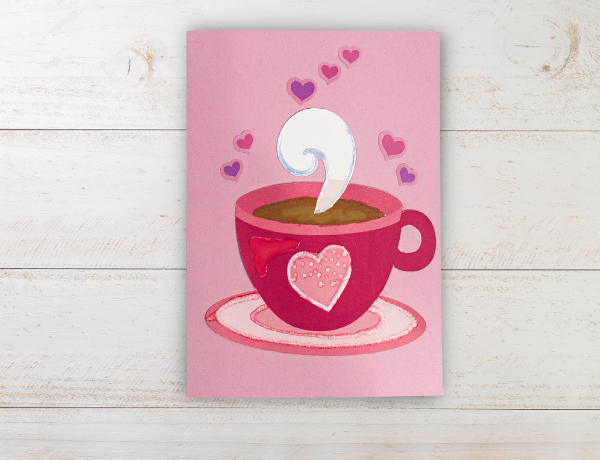
- PNG Clipart – I’m using this coffee clipart from Pretty Graphik
- A Card
- Adhesive
Optional Embellishments:
- Ranger Glossy Accents
- Glitter Glue
- Ranger Liquid Pearls
- Stickers
Calibrate Your Machine for Print Then Cut
Before you go on, if you’ve never used the Print Then Cut feature with your Cricut, then you will first need to calibrate your machine. Doing this ensures that your Cricut will cut around the edges of your printed designs.
Check out Cricut’s tutorial on how to do this and then meet me back here!
Upload the Image(s) for Your Print and Cut Cardstock Card
Choose the image you would like to use for your project and then upload it to Cricut Design Space. You can also choose one of the images from Cricut Design Space.
Not sure how? Check out this post to see how to Upload Images to Cricut Design Space. Scroll down to PNG clipart.
Once your design is uploaded, click Add to Canvas.
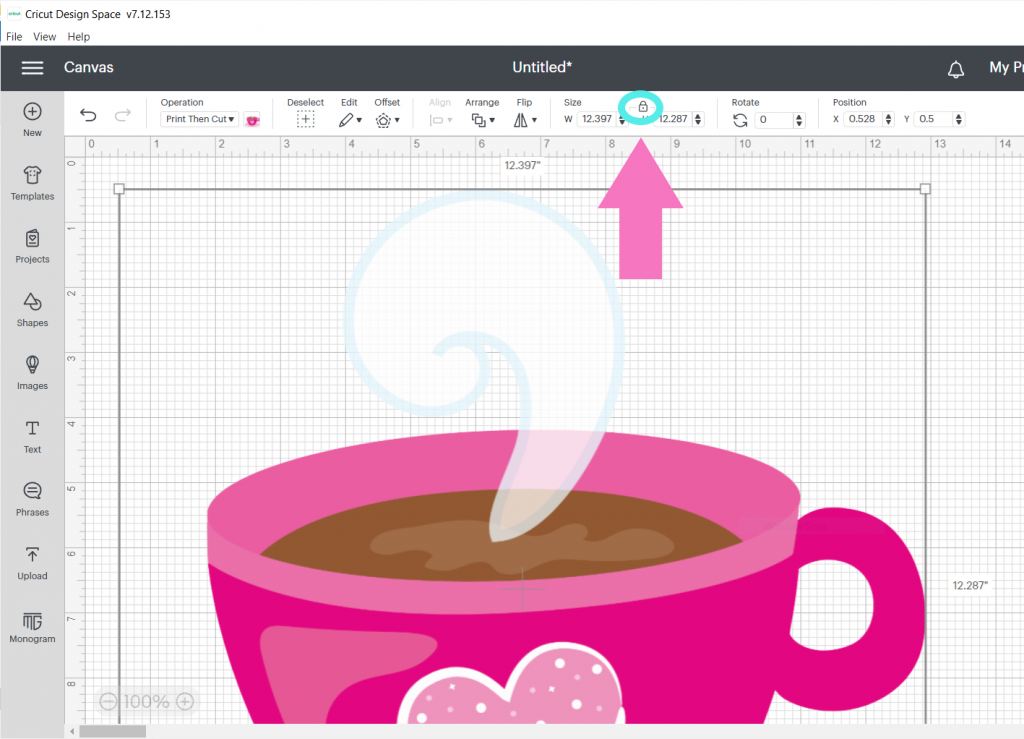
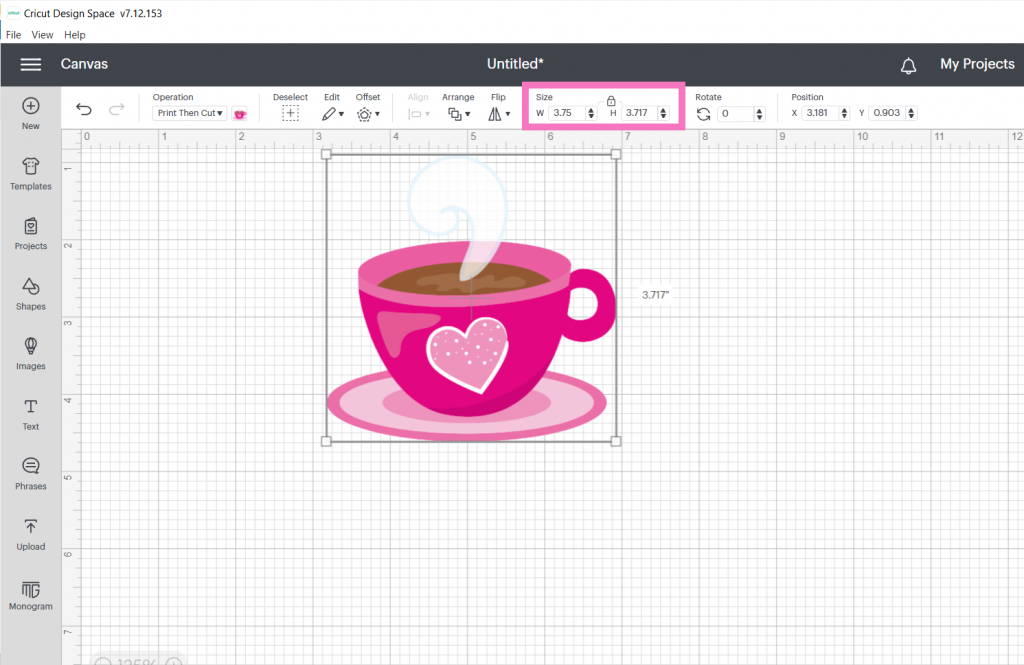
Resize Your Image to Fit Your Card
Once your image is uploaded and inserted into the canvas, resize your design based on the size of your card. If you don’t have a blank card on hand, you can simply get out a paper trimmer or scissors and hand fold one.
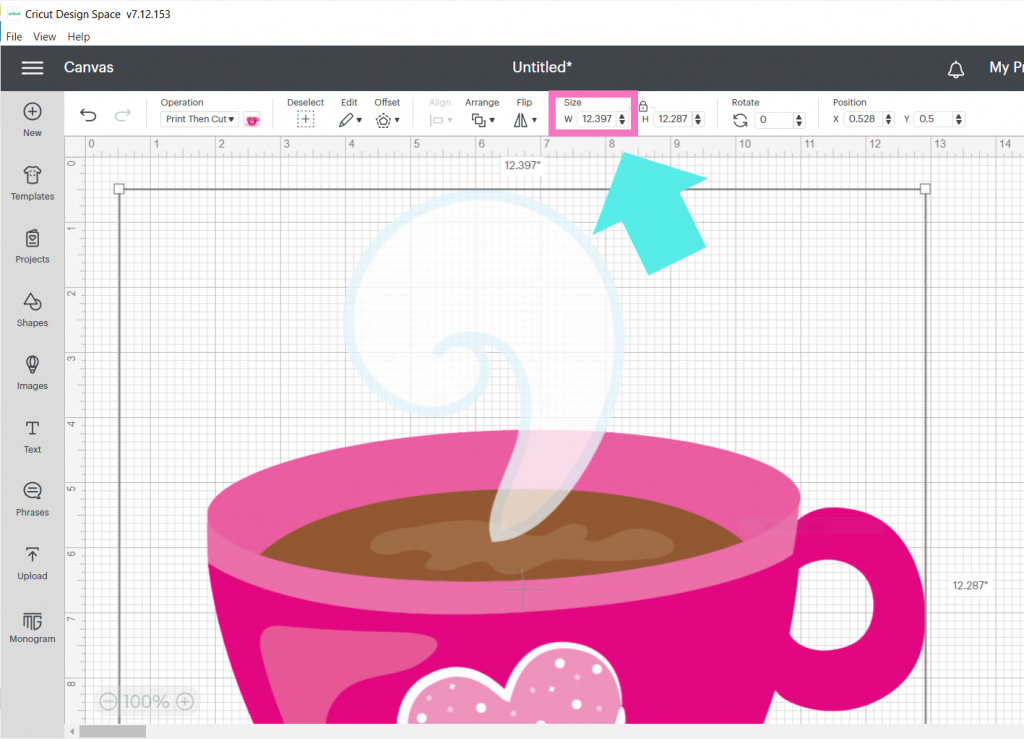
Make sure the lock button is set when you go to resize! If not, you will end up with a skewed image!
And that’s it for designing this project! Pretty easy, right?!
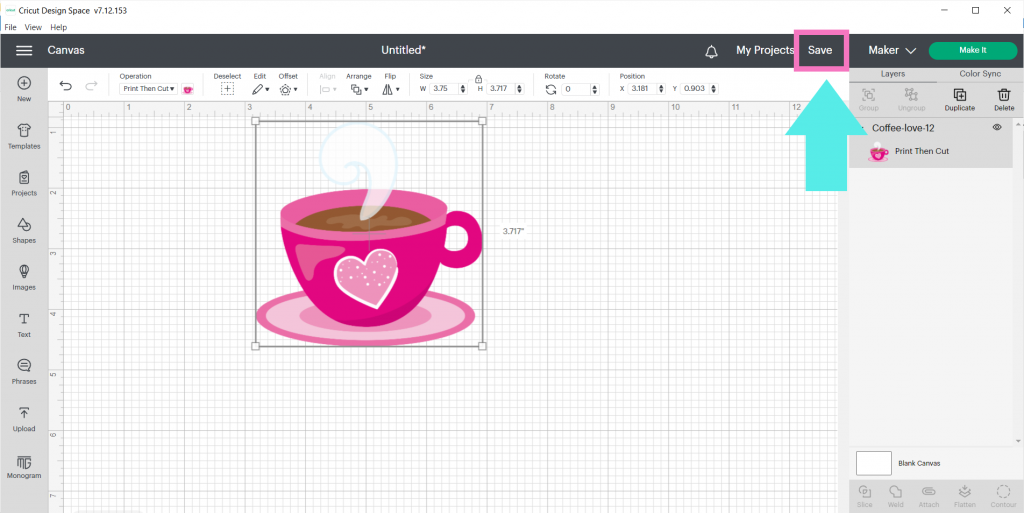
Save Your Project
Before you hit Make It, go ahead and save your project! Go to Save in the upper right hand corner.
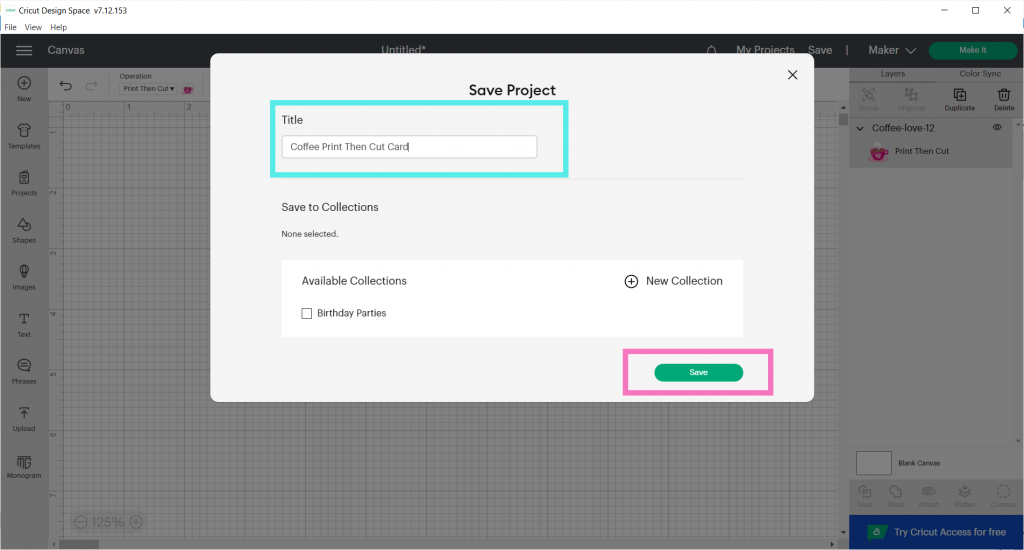
Then give your project a title and select save!
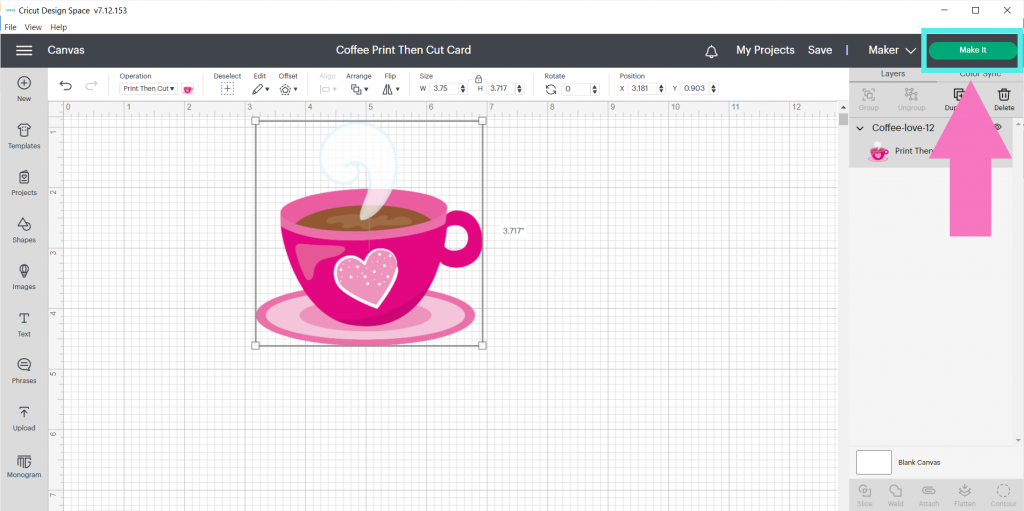
Let’s Make It!
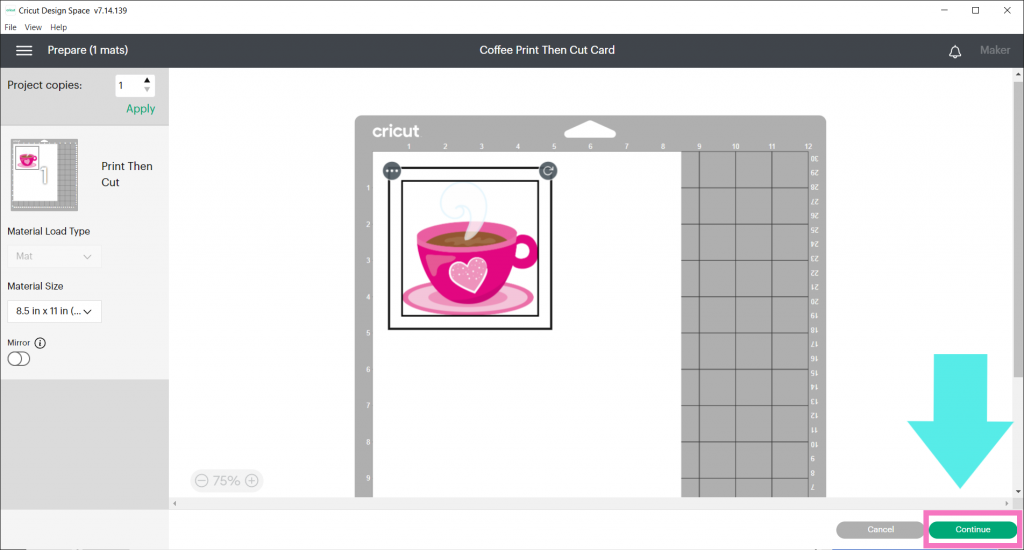
In order to send your print and cut cardstock project to the printer, you will need to have your Cricut turned on and either connected via bluetooth or USB. Check out Cricut’s tutorial here on how to pair your Cricut Explore or Cricut Maker Via Bluetooth.
Double check that your print and cut image looks correct. You should see a black box around your image(s). If everything looks good, select Continue.
Print Your Images
Now it’s time to print! Select Send to Printer.
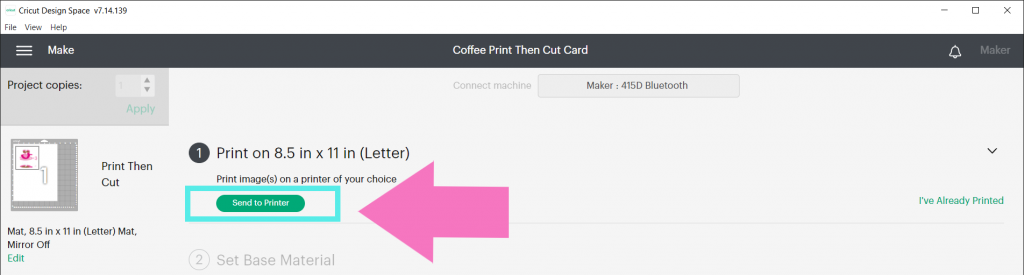
Also, notice that you can select I’ve Already Printed. This is great when you’re short on time or get interrupted. You can print now and then come back later to cut, if needed!
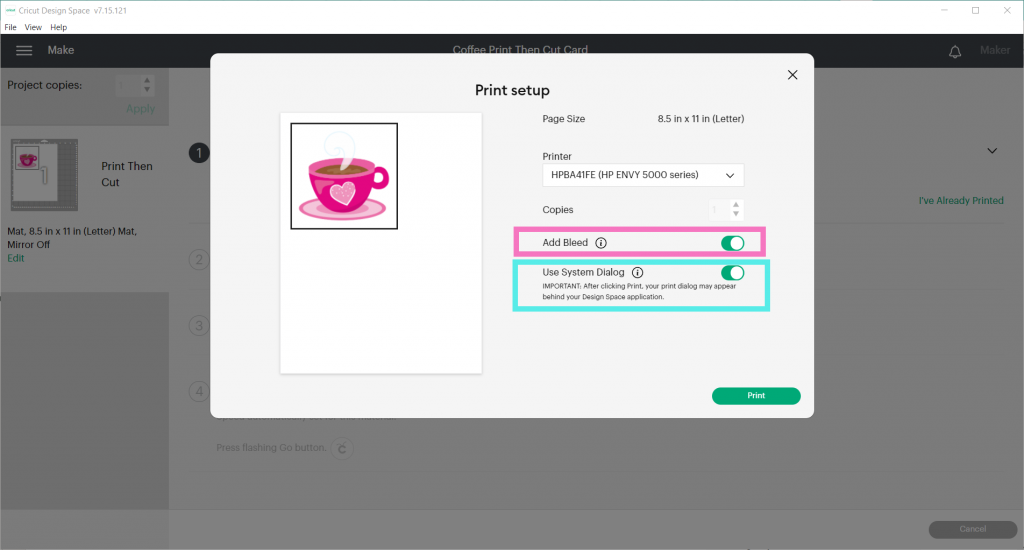
Select your printer and then make sure Add Bleed is toggled on.
Use System Dialog to set your print quality to Best and choose your paper type. I chose Other Matte Inkjet Papers.
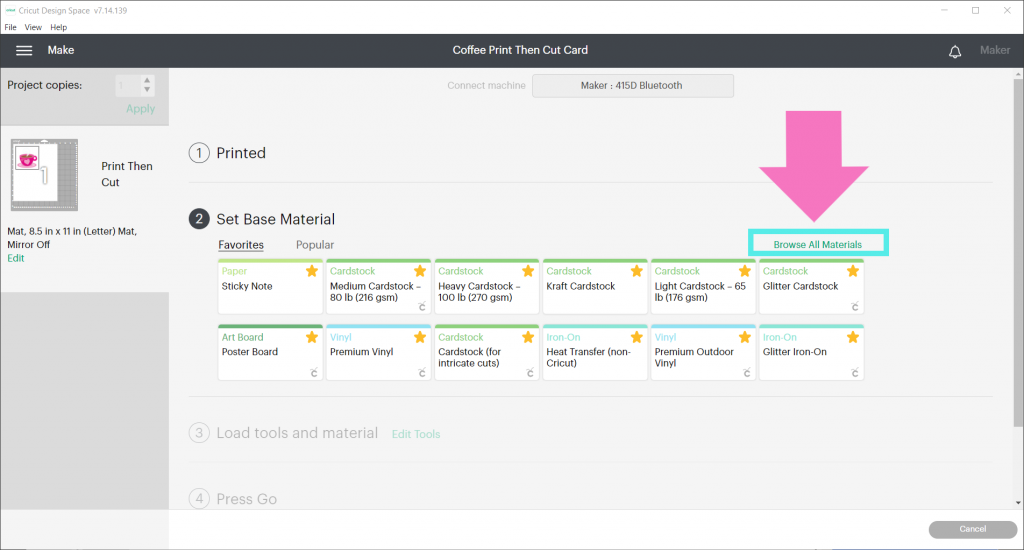
Cut Your Print and Cut Cardstock Project
Now it’s time to cut! Place your print and cut cardstock on the Cricut mat- your Cricut is going to be looking for the black box. Make sure your paper is aligned straight on the mat.

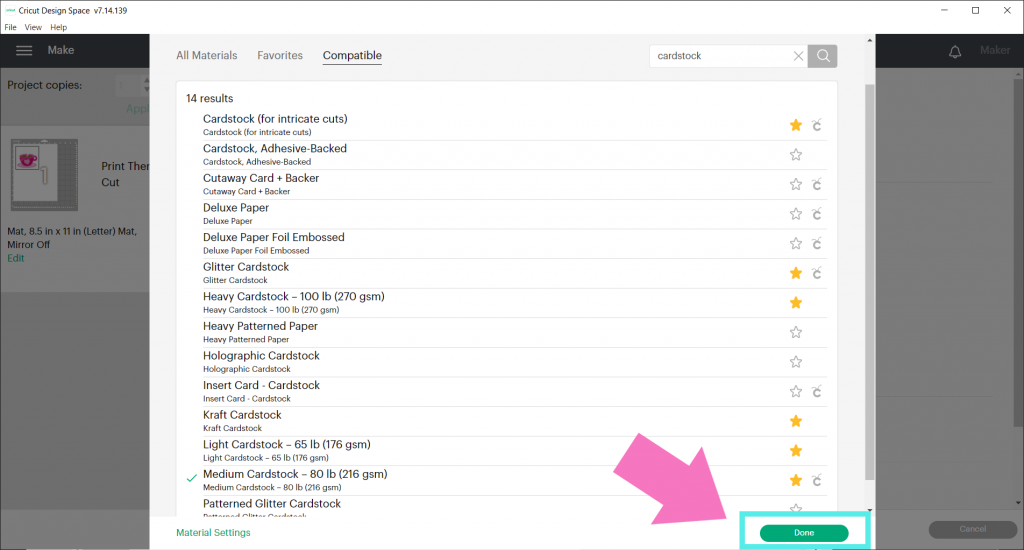
Next, choose your cut settings. You can either choose from favorites or click on Browse All Materials.
Type “Cardstock” in the search
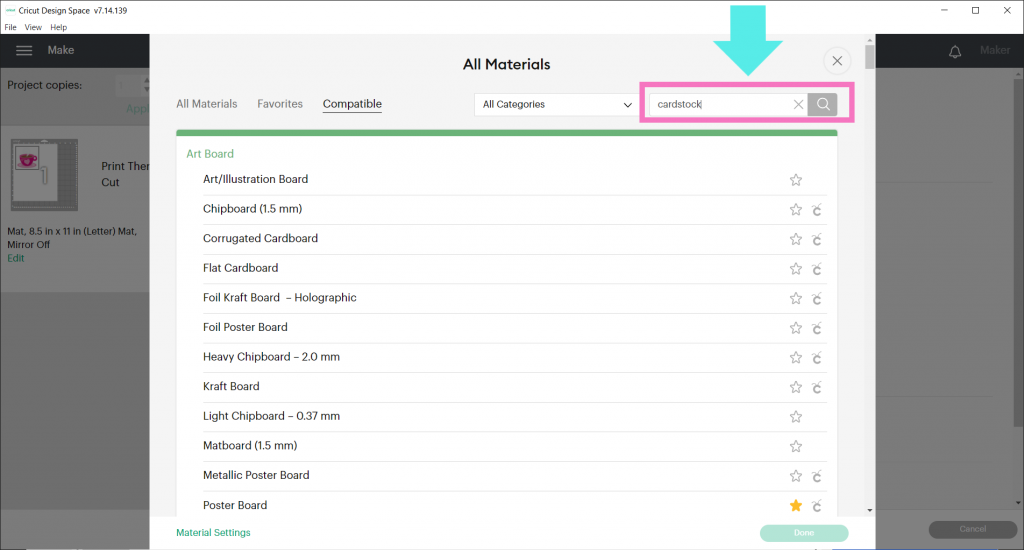
And then choose from the list. I’m cutting Recollections cardstock and have personally found that Medium Cardstock with more pressure is the best setting.
Craft Tip: ALWAYS do a test cut of your material before creating a project! Then, be sure to write it down somewhere for next time!
Once you’ve chosen your material, click done.
Load your Cricut mat into the machine and let your machine do it’s magic!
Your machine will take a little bit scanning the print and cut cardstock. It’s analyzing to figure out exactly where your image is on the cardstock so it knows exactly where to cut.
Once your machine is done cutting, unload your mat. Flip your mat over and remove the mat away from the cardstock (instead of removing the cardstock off the mat.) this prevents it from curling!
Then use your Cricut spatula and gently insert it under the design and lift.
That’s it! Now, comes the fun part!
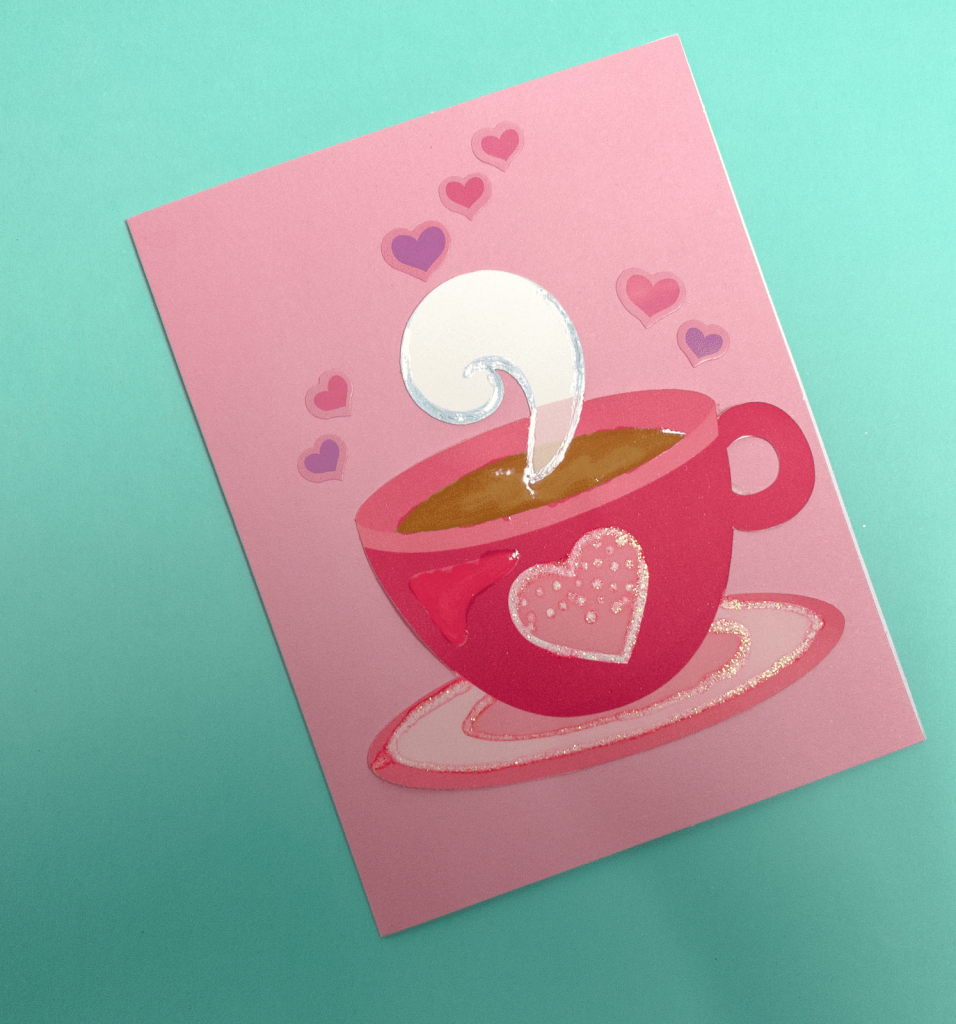
Embellish and Finish Your Card!
Take your print and cut cardstock design and glue it to your card! For this, I’m just using a simple glue stick!
Now, get out some glitter glue and embellishments and have fun! This is my favorite part! You can totally leave the card as is and it still looks great! Or, you can take it to the next level by embellishing it! I’m obsessed with the effect of the Glossy Accents and love to find excuses to use it!
Now that you know how to print and cut cardstock, what designs and projects are you going to make? Tell me in the comments!
Have a Cricut question or tutorial you’d like me to write on? Let me know! I’d love to help!